Difference between revisions of "Creating a synth chain and adding a MIDI chorder + audio FXs"
Jump to navigation
Jump to search
| Line 5: | Line 5: | ||
From here we select the first option “New Synth Chain” by short-push [[Zynthian_UI_User_Guide_-_V5#Using_the_knobs|Knob#4]]. | From here we select the first option “New Synth Chain” by short-push [[Zynthian_UI_User_Guide_-_V5#Using_the_knobs|Knob#4]]. | ||
| − | [[File: | + | [[File:Chain_Screen.png|400px|right]] |
| − | |||
== Select Midi Synth == | == Select Midi Synth == | ||
Revision as of 12:49, 5 December 2023
The goal of this little tutorial is to guide you through creating your first synth and adding a couple of effects.
1 Create a New Synth Chain
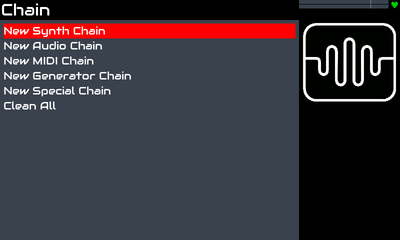
Once our Zynthian is started for the first time, the first screen that will appear will be the Chain Screen.
From here we select the first option “New Synth Chain” by short-push Knob#4.

2 Select Midi Synth
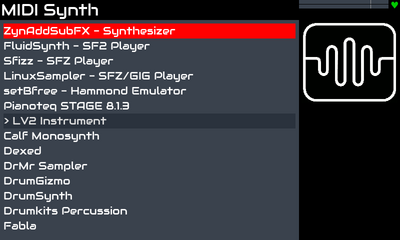
After selecting the chain, a list will appear with the different synthesizers available in Midi Synth Screen.
With knob #4 we can move through the available list and with a short-push we will select the main processor of this chain.
In this tutorial we will select the ZynAddSubFX - Synthetizer
