Difference between revisions of "Zynthian UI User Guide (oldstable-2109)"
m (→Admin Menu) |
|||
| Line 164: | Line 164: | ||
* Start TouchOSC bridge | * Start TouchOSC bridge | ||
* Start Audio -> MIDI | * Start Audio -> MIDI | ||
| − | * Test MIDI - plays | + | * Test MIDI - plays the test.mid file |
| − | * Test Audio - plays | + | * Test Audio - plays the (long) test.mp3 file |
* Update Zynthian Software - downloads and installs the latest software | * Update Zynthian Software - downloads and installs the latest software | ||
* Update Zynthian Library - downloads the latest instruments | * Update Zynthian Library - downloads the latest instruments | ||
Revision as of 03:59, 9 October 2018
1 General Concepts
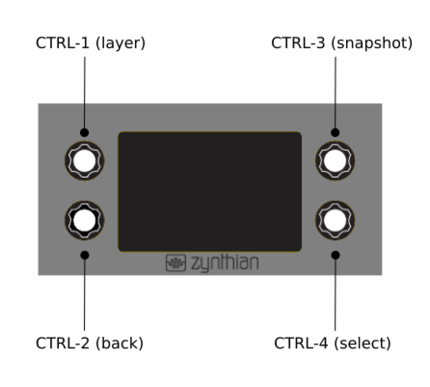
The Zynthian UI is displayed on a touch display and controlled by 4 rotary-encoders with switches (push). The encoders/switch knobs are used to navigate between the different screens/menus, select options and change the instrument parameters, acting as MIDI/OSC controllers. You can emulate the knobs behaviour using the touch-display, but it's sub-optimal and accessing some features could be tricky.
Currently there are two main screen-types (screen-layouts):
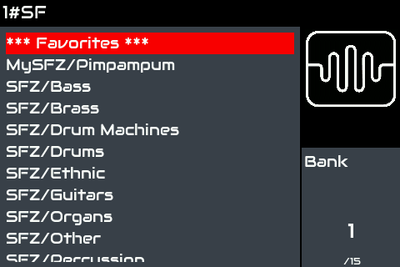
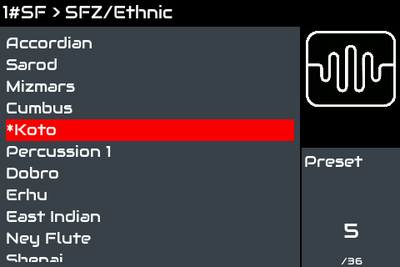
- Selector Screen: a list of items that you can scroll and select with the SELECT (4) knob
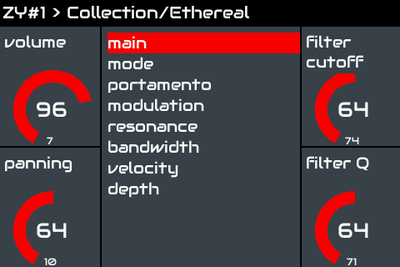
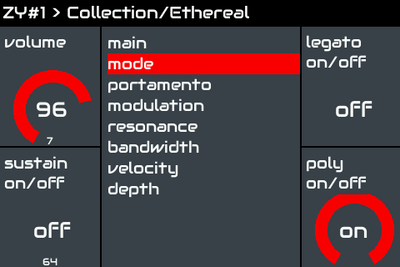
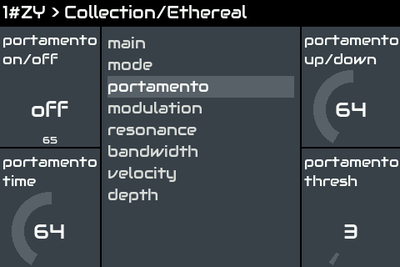
- Controller Screen: In the corners, 4 control widgets (one for each knob), with label and value indicator (graphic and numeric). In the middle, a list of controller maps which you can use to change or rotate using the SELECT (4) knob.
Almost every Zynthian UI screen fits in one of these 2 types, however, other screen-types does exist:
- Confirmation Screen: It will ask you to confirm some operation.
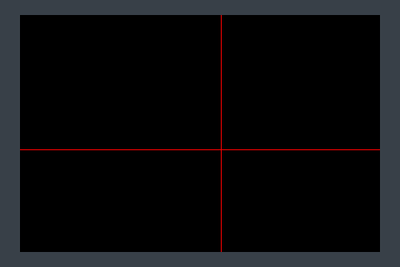
- XY Controller Screen: It allows to modify 2 parameters at once using the touch interface.
- Info Screen: It display info about some operation, like "Update Software", or "Network Info"
- Sequencer: It's a planned feature not implemented yet ;-)
There are 3 types of clicks (push) that can be performed, depending on how long you hold down the knob (or push on the touch-display):
- short: less than 0.3 seconds
- bold: between 0.3 and 2 seconds
- long: more than 2 seconds
Actions for each knob and click-type are context dependent. Generally, the SELECT knob is used to navigate and a short click on it will select an item on a "Selector Screen". Inside a "Controller Screen", short clicks can be used to rotate between layers (LAYER knob) or between controller pages (SELECT knob). "Bold-clicks" are intended as shortcuts for jumping to some specific screens. Clicking the BACK knob generally jumps to the previous screen in the workflow sequence.
Most of actions depends on context (the current screen), but there are some actions that are global and will work from any screen:
- long-back: go to the admin menu
- long-select: power off
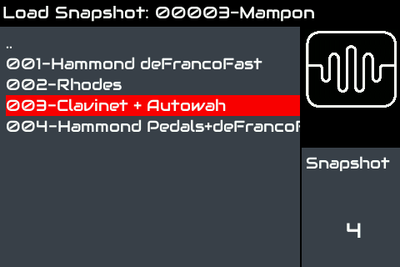
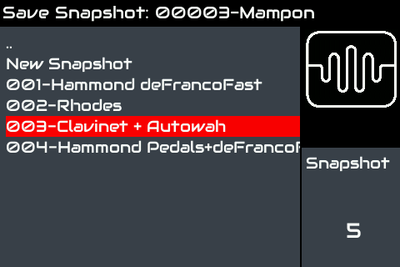
Snapshot actions are also global an will work from any point in the workflow. If you click SNAPSHOT (3) once, you get the Load Snapshot menu, another click and you will be in the Save Snapshot menu. If you bold-click SNAPSHOT then you will go directly to the Save Snapshot screen. The Snapshot screen have 2 levels: bank selection (directory) and snapshot (file). These actions are better explained below.
2 The Zynthian UI Workflow
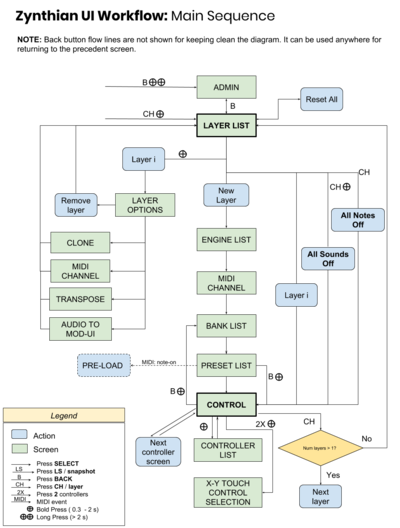
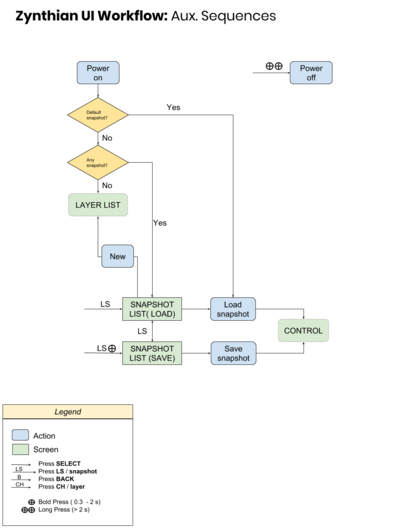
The next flowcharts show the different "screens" or "functions" and the way to reach each one using the 4 switches. It could be a good idea to print these 2 flowcharts and keep it near of your Zynthian Box until you memorize the flow and the spirit of Zynthian UI got inside of you ;-)
If you want to contribute improving these flowcharts, you can edit it using the Google Documents Tools:
- Main sequence: zynthian_ui_workflow_1
- Aux. Sequences: zynthian_ui_workflow_2
3 The UI Screens
3.1 Layer List
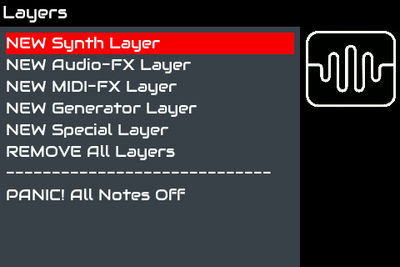
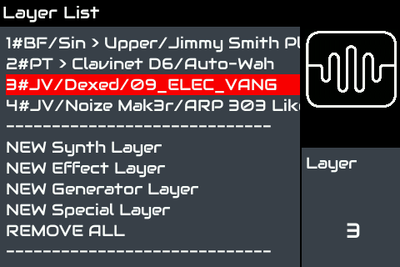
This is the first screen you see when you power on (when no screenshots have been stored yet.) A layer is a synth engine preset assigned to one (or all) MIDI Channel. Choose New Layer to get started.
There are 4 options in this screen:
- New Layer => Create a new Layer
- Remove All Layers => Remove all layers, returning to the initial state.
- All Notes Off => All notes are released (note-off) by sending CC#123 to all channels.
- All Sounds Off => All sounds are stopped abruptly by sending CC#120 to all channels.
The 2 last options (All Notes Off / All Sounds Off) can be triggered by short/bold clicking CTRL-1 (layer) from the layer screen (contextual actions). You can trigger these actions from any point in the workflow by simply clicking twice CTRL-1.
You can create up to 16 layers. Several layers may be assigned to the same MIDI Channel, however these layers are MIDI-bond (what does this term mean) because they receive the same MIDI messages. This can be a problem when trying to adjust the volume (CC#7) or other parameters assigned to standard MIDI CCs. To solve this problem, you can use the "Clone" feature, that allows you to bind several layers while keeping MIDI CCs and other MIDI messages (Program Change, Channel Pressure, etc.) independent.
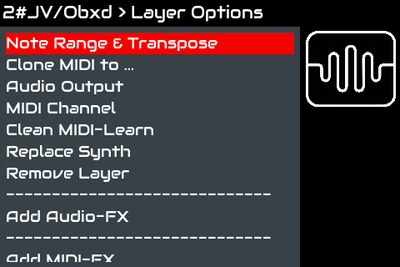
If you bold-press the select switch, the "Layer Options" menu will be displayed for the selected layer. This menu allows you to:
- Clone => clone the layer's MIDI channel messages (note on/off, pitch-bending, key-press) to other MIDI channels. Note that not all messages are cloned. Some are kept independent: CCs, channel-pressure, program change, ...
- Transpose => transpose the layer's MIDI channel up and down, by semitones.
- Audio => MOD-UI => route the layer's engine audio output to the MOD-UI audio input, allowing post-processing the audio signal. You can use this feature for creating your own customized FX chains.
- MIDI chan => change the assigned MIDI Channel.
- Remove Layer => Remove the layer.
3.2 Engine Selection
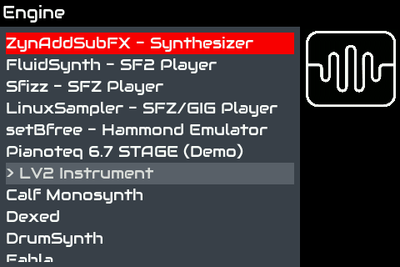
When you create a new layer, you are asked which synth engine you want to use for the new layer. A list of synth engines to choose from is displayed. The zynthian logo on the right is animated while the engine is being loaded.
Some engines have special behavior regarding layers and MIDI channels:
- setBfree: This engine ALWAYS creates 3 layers assigned to different MIDI channels (1, 2 & 3), each one corresponding to the upper, lower and pedals sections of the Hammond B3 emulation.
- Pianoteq: Only one layer is allowed to be created, assigned to the MIDI channel you choose.
- MOD_UI: Only one layer is allowed to be created and it's assigned to ALL MIDI channels. If you want to filter the messages by channel, you can do it within the MOD-UI patch. (There are plans for improving this behavior.)
- PureData: Only one layer is allowed to be created and it's assigned to ALL MIDI channels. If you want to filter the messages by channel, you can do it within the PD patch. (There are plans for improving this behavior.)
- Aeolus: NORMALLY 4 layers are created, assigned to different MIDI channels (1,2,3 & 4), each one corresponding to the 3 manuals + 1 pedal of the Aeolus default instrument definition. You can change the MIDI channel assignments from the Aeolus native UI. When using a different instrument definition, you have to tweak the engine's code a little bit.
3.3 MIDI Channel selection
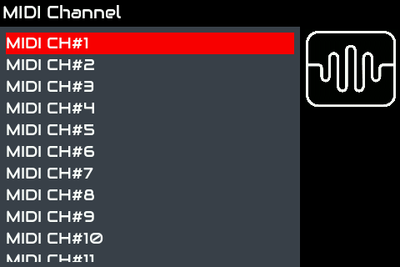
This screen is shown after you have chosen the synth engine for a new layer. It is also displayed when you choose to assign the layer to a different MIDI Channel in the Layer Options screen. Choose the MIDI channel you want to assign to the layer. You can assign several layers to the same MIDI Channel. In this case, all the assigned layers will react to the same MIDI messages coming from the assigned MIDI Channel.
3.4 Bank selection
Presets (instruments, patches, or sound designs) for a synth engine are organized into banks. Choose a bank to see the list of presets you can pick from within that bank.
3.5 Preset selection
Once you have chosen a bank, Preset Screen will be shown. Choose a preset to load the instrument/sound/patch you want and the Control Instrument screen will be shown.
If the "pre-load on note-on" feature is enabled, you can pre-load the presets by playing notes. When you do so, the highlighted preset will be pre-loaded before clicking select.
You can return to the control screen directly, without selecting any preset, by clicking "bold-back". In such a case, the previously selected instrument will be loaded again in case you pre-loaded some preset.
3.6 Instrument Control screen
This screen is shown after you have chosen a preset. Your instrument is now enabled and playable and you can modify the parameters.
Turning any of the 4 knobs changes the values of the synth parameters displayed in the squares at the sides of the screen adjacent to each knob. You also can use the touch interface to change the values. See below.
The central list shows the different pages of parameters that you may alter. You can navigate the page of parameters by clicking short-Select to step by one page.
If the page list is long, you can "bold click" the Select switch to navigate the list using the Select knob.
If you click 2 switches at once, then you will select these 2 parameters for XY-control using the touchscreen (ala Kaoss Pad).
You can press the Layer switch to step over the layer list. If you bold-press, the layer list will be shown.
Press the Back switch to return to previous screen. If you press bold-Back, then you will go 2 screens backwards.
3.7 Load/Save Snapshot
Click the Snapshot switch to enter the Load Snapshot screen. Another click and you will be in the Save Snapshot screen. You can also use bold-click to go directly to the Save Snapshot screen.
Obviously, before loading any snapshot, you should save one. Snapshots are organized in banks, so if you don't have any banks, you should create one. Zynthian UI will use numbers for naming the banks and snapshots. Later, using the webconf tool you can rename the banks and snapshots to something more explicit.
If you want to go up one level, from snapshots to banks, you should use the ".." entry in the list. The Back button won't work here.
3.7.1 Default Snapshot
You can save a "Default Snapshot". This snapshot will be loaded automatically at startup. To delete it, you should use the webconf tool.
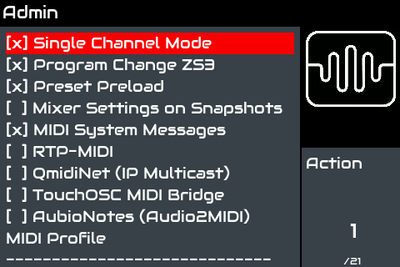
3.8 Admin Menu
Pressing the Back knob, when you are in the Layer List screen, brings you to the Admin menu.
The last item is how you safely power off the Zynthian without corrupting data files.
- Network Info - displays the IP address (ifconfig inet addr)
- Start WIFI - Starts or Stops WIFI (toggle)
- Start Audio Recording
- Start TouchOSC bridge
- Start Audio -> MIDI
- Test MIDI - plays the test.mid file
- Test Audio - plays the (long) test.mp3 file
- Update Zynthian Software - downloads and installs the latest software
- Update Zynthian Library - downloads the latest instruments
- Restart GUI
- Reboot
- Power Off
4 Touch Screen UI
You can navigate and control the Zynthian UI without knobs/encoders/switches at all, using only the touchscreen.
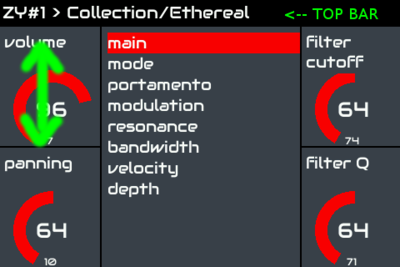
You can "emulate" the switches by tapping the controller widgets (squares in the 4 corners of the screen). There are short, bold and long actions -- exactly the same workflow as with hardware knobs. The only screen that currently shows the 4 controllers is the "Instrument Control" screen, so some features are only accessible from there. When the "back" widget is not available, you can go back by tapping the top bar.
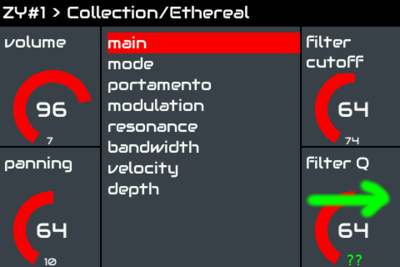
You can change the values of the controllers by "sliding" over the widgets. (see the green arrow in the figure here) This is the same as turning the knob. If you are using a mouse, the mouse wheel will modify the parameter value.
When clicking (tapping/touching) the topbar, a "back" event is triggered. It's a quick & dirty fix and probably it will change in the future, but meanwhile it will enable you to fully control Zynthian using the touchscreen if you don't have knob hardware.
5 Global MIDI-learning
This allows you to easily connect any parameter in the Zynthian UI to any CC knob/slider on an external MIDI controller. (I intend to extend this feature to other MIDI messages, but currently only CC messages are supported.) Anyway, MIDI filter rules can handle any special cases, so it’s not an urgent task.
This works with ALL the engines, using the engine’s native MIDI-learning capability when available (and convenient) or the Zynthian’s MIDI-learning mechanism, within the MIDI filter. To be more explicit, native MIDI-learning is used for MOD-UI and ZynAddSubFX OSC parameters. All the other MIDI-mapped parameters are managed by the Zynthian’s MIDI-learning mechanism.
You get on-screen feedback during the learning process. When you enable MIDI-learning for a parameter, a small green text displaying "??" appears at the bottom of the controller/parameter area in the Zynthian UI. When the parameter is connected to a CC, the number of the assigned CC is shown in the same place.
The MIDI-learning configuration is stored in the snapshot.
5.1 How to use MIDI Learning
First, you need a working touch interface in your display. If you don't have a touchscreen, you could use a mouse ...
Learning:
1. In the "Instrument Control" screen, navigate through the parameter screen list to get to the parameter you want to learn.
2. In the parameter/controller area, slide with your fingernail from left to right. A green "??" should appear at the bottom.
3. On your MIDI controller, move the desired knob/slider (or a CC-assigned pad).  The green "??" should be replaced by a tiny number, and the parameter should change when you move the knob/slider or push the pad. CC-assigned pads can be very useful for on/off parameters.
Unlearning:
1. In the "Instrument Control" screen, navigate through the parameter screen list until you get to the parameter you want to unlearn.
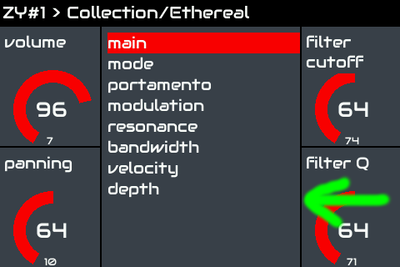
2. In the parameter/controller area, slide with your fingernail from right to left. The tiny number, indicating the current CC assignment, should disappear or change. If the parameter is an engine-specific controlled engine, the number will disappear. If the parameter is a hardcoded MIDI-mapped parameter, then the number will change.
