Difference between revisions of "GeonKick"
(Created page with "== Description == Geonkick is a free software synthesizer capable of generating a wide range of percussive sounds, including kicks, snares, claps, hi-hats, shakers, and also...") |
|||
| (5 intermediate revisions by the same user not shown) | |||
| Line 57: | Line 57: | ||
** Ogg | ** Ogg | ||
* Open & Save presets in JSON format | * Open & Save presets in JSON format | ||
| + | |||
| + | == First power on of GeonKick == | ||
| + | |||
| + | First, check if you have the Geonkick LV2 plugin activated. Via webconf at https://zynthian.local go to the menu ''SOFTWARE / LV2-Plugins'' and then ''MIDI Synth''. Select Geonkick and confirm the selection by clicking the ''SAVE'' button at the bottom of the page. | ||
| + | |||
| + | [[File:Fig-01-Geonkick-activation.png|thumb|center]] | ||
| + | |||
| + | Now we can make chain with Geonkick since we will have it in the menu. | ||
| + | |||
| + | [[File:Fig-empty-mixer.png|thumb|center]] | ||
| + | |||
| + | We must go to the main menu and select Add Synth Chain | ||
| + | |||
| + | [[File:Fig-02-Geonkick-add-chain.png|thumb|center]] | ||
| + | |||
| + | In next step select Geonkick | ||
| + | |||
| + | [[File:Fig-03-Geonkick-selection.png|thumb|center]] | ||
| + | |||
| + | After selection of midi channel you are in Zynthian UI of Geonkick | ||
| + | |||
| + | [[File:Fig-04-Geonkick-Zynthian-UI.png|thumb|center]] | ||
| + | |||
| + | After back to main mixer page you see Geonkick without preset. | ||
| + | |||
| + | [[File:Fig-05-.png|thumb|center]] | ||
| + | |||
| + | Now you need to set up to work in GeonKick's natural GUI | ||
| + | |||
| + | Turning on VNC check and SAVE button on the bottom of page in first | ||
| + | |||
| + | [[File:Fig-06-Geonkick-VNC-start.png|thumb|center]] | ||
| + | |||
| + | Zynthian restarts its UI. | ||
| + | |||
| + | Now it's time to work in the natural GUI of Geonkick | ||
| + | |||
| + | In webconf https://zynthian.local go to a menu Interface / VNC - Engines -> this opens a new window with connection to the Synth Engine Native GUIs. Click on Connect and fill password raspberry and push enter key. | ||
| + | |||
| + | [[File:Fig-07-Geonkick-GUI-01.png|thumb|center]] | ||
| + | |||
| + | We get to the natural GUI of Geonkick. I circled area of the inportant parts in figures. | ||
| + | |||
| + | Use the Play button (in red) to play a specific sound. The resulting sound can be composed of up to three levels. You can turn on the levels with the L1, L2 and L3 buttons (in the blue circle). | ||
| + | |||
| + | Each level contains two oscillators, for which you can choose the shape of the wave function or even record a sample with a maximum length of 4 s. You can influence the course of the oscillator with Amplitude and Frequencies, or you can also switch on a filter for each. Furthermore, Oscillator1 can control Oscillator2. You can then add white or brown noise to the layer level and also use another filter. At the overall General level, you can then influence the overall Amplitude and duration of the sound. Optionally, the overall filter, turn on compression and distortion and define the ratio of individual levels L1, L2 and L3. | ||
| + | |||
| + | In the upper part, there is a graphic display of the sound progression for a specific oscillator of the selected level. Here you can influence the course of the amplitude, frequency and filter over time. If it is a straight line at 100% there is no influence. But you can move points or add more by right-clicking and reduce the amplitude at that time. You can also modulate the frequency in time and the same applies to the filter frequency. The selected value in the settings is taken as 100% and you influence it downwards. | ||
| + | |||
| + | There are a lot of tutorials on youtube for how to create sounds in GeonKick. Try going through, for example, these: | ||
| + | |||
| + | https://www.youtube.com/watch?v=EtWSnbmdB9w | ||
| + | https://www.youtube.com/watch?v=_eXcQef_mSQ | ||
| + | https://www.youtube.com/watch?v=WnxUgDoOriQ | ||
| + | https://www.youtube.com/watch?v=qQkAIzF9qnY | ||
| + | https://www.youtube.com/watch?v=z4UZyuihH2s | ||
| + | https://www.youtube.com/@Geonkick/videos | ||
| + | |||
| + | |||
| + | We probably won't be sound masters right away who start creating our own sounds, but we'll break away from some available pre-made sounds. For this, it is good to know that you can switch between the Controls and Kit options, which I have indicated with a yellow area. | ||
| + | |||
| + | Switching to the Kit settings GUI shows the following | ||
| + | |||
| + | [[File:Fig-08-.png|thumb|center]] | ||
| + | |||
| + | Click the + next to the yellow circle to add another sound to the kit. By double-clicking on the area of the blue dot, i.e. on the name of the sound, you will be able to overwrite it. So by clicking on the cell with the green dot, you assign a specific note to play the given sound. If you select the ANY option, the sound will be played on any note, which is not exactly the best choice. At the end, I left the option to upload a prepared Kit of sounds, i.e. the symbol circled in yellow. Before you press it, you need to prepare the sounds and upload them to Zynthian. | ||
| + | |||
| + | == Preparing and uploading sounds to Zynthian == | ||
| + | |||
| + | I searched the internet for available kits and sounds for GeonKick and the only source is right on github repository. They are not installed in Zynthian stable 24-01 ( I couldn't find them), so we have to get them into Zynthian. I recommend the following procedure: | ||
| + | |||
| + | * download the *.tar.xz files from the repository https://github.com/Geonkick-Synthesizer/geonkick/tree/main/presets | ||
| + | * extract them to the directory.in your PC. I used my favorite directory zynthian-my-data-for-clear-installation/files/geokick/ for example. Each tar.xz file creates a kit's subdirectory. | ||
| + | * copy from the source on the PC to the directory /home/pi/zynthian-my-data/files/geonkick. You can use sfpt or ssh with scp. I use FileZilla for convenience, see image. | ||
| + | |||
| + | [[File:Fig-09-geonkick-transfer-kits.png|thumb|center]] | ||
| + | |||
| + | So we have the necessary files in Zynthian and I can go back to creating presets | ||
| + | |||
| + | == Creation of presets from recorded kits == | ||
| + | |||
| + | Let's show you how to get premade kits into GeonKick. I will proceed alphabetically and we will show the basics on the AVL DrumKit. The procedure is the same for all kits. | ||
| + | |||
| + | === AVL DrumKit === | ||
| + | |||
| + | [[File:GeonKick-AVL-DrumKit.ogg|thumb|Patterns on AVL DrumKit]] | ||
| + | AVL DrumKit was made by Iurie https://geonkick.org and is based on AVL Drumkits samples http://www.bandshed.net/avldrumkits/ | ||
| + | |||
| + | After clicking on the kit upload symbol, in the last picture I have marked it in a yellow circle, a dialog box will appear and you need to click through to the directory ''/home/pi/zynthian-my-data/files/geonkick/AVL-Drumkit''. | ||
| + | |||
| + | [[File:Fig-10-geonkick-select-AVL.png|thumb|center]] | ||
| + | |||
| + | There is only the ''AVL-Drumkit.gkit'' file in that directory, which we will select. By the way, this file is 16MB because it contains sampled drum sounds. We will confirm its selection and all 16 lines will be filled in the table of sounds, i.e. the jit has the maximum number of sounds. The green dots are in the ANY column, which is not the right choice for midi playback. | ||
| + | |||
| + | [[File:Fig-11-geonkick-AVL-ANY.png|thumb|center]] | ||
| + | |||
| + | So let's redial the notes for the individual drum sounds. By the way, starting from A4 is quite high compared to standard mappings for drums. In this version it is not possible to select other notes, versions 3.x.x allow this. So I simply clicked through each line in turn to the correct form as is in the picture. | ||
| + | |||
| + | [[File:Fig-12-geonkick-AVL-notes.png|thumb|center]] | ||
| + | |||
| + | We will already save the result in the preset. From the window menu, select ''Preset'' and then ''Save''. Fill in the name of the preset and save. | ||
| + | |||
| + | [[File:Fig-13-geonkick-AVL-save-preset.png|thumb|center]] | ||
| + | |||
| + | All that's left is the audio demo, I used the same pattern as in the demos for [[DrumGizmo]] | ||
| + | |||
| + | === DigitalSamba === | ||
| + | |||
| + | [[File:Geonkick-digitalsamba.ogg|thumb|Patterns on DigitalSamba kit]] | ||
| + | |||
| + | The creator of this kit is Bart Brouns <https://magnetophon.nl>. | ||
| + | |||
| + | The procedure for loading the kit is the same. So I click on add a kit, we find and select the file DigitalSamba.gkit. Subsequently, we adjust the assignment of notes to individual sounds. Finally, save the preset. | ||
| + | |||
| + | [[File:Fig-14-geonkick-DigitalSamba.png|thumb|center]] | ||
| + | |||
| + | The kit contains the following sounds | ||
| + | |||
| + | Kick1 | ||
| + | Kick1Double | ||
| + | Kick2 | ||
| + | Metallic Snare | ||
| + | GunShotSnare | ||
| + | ThumpSnareL | ||
| + | ThumpSnareR | ||
| + | SoftSnareLow | ||
| + | SoftSnareHi | ||
| + | Anvil-HH | ||
| + | OpenHH | ||
| + | HiSurdo | ||
| + | LowSurdo | ||
| + | LowSurdoDouble | ||
| + | Cowbell | ||
| + | Ride | ||
| + | |||
| + | === DSoS Kit === | ||
| + | [[File:Geonkick-DSoS.ogg|thumb|Patterns on DSoS Kit]] | ||
| + | |||
| + | The creator of this kit is Dark Side of Synth <https://darksideofsynth.com> | ||
| + | |||
| + | The procedure for loading the kit is the same as for ALV DrumKit. So we click on add a kit, we find and select the DSos.gkit file. Subsequently, we adjust the assignment of notes to individual sounds. In the last step, we save the preset. | ||
| + | |||
| + | |||
| + | [[File:Fig-15-geonkick-DSoS.png|thumb|center]] | ||
| + | |||
| + | The kit contains the following sounds | ||
| + | |||
| + | Chiptune | ||
| + | Hi-Hat | ||
| + | Kick | ||
| + | Snare | ||
| + | Squilches | ||
| + | |||
| + | === HaraldReveryKicks === | ||
| + | [[File:GeonKick-HaraldReveryKick.ogg|thumb|Patterns on HaraldReveryKick Kit]] | ||
| + | |||
| + | The creator of this kit is Harald Revery <https://haraldrevery.bio.link> | ||
| + | It is not a drum kit in the standard sense, but a set of differently tuned kicks. | ||
| + | |||
| + | The procedure for loading the kit is the same. So we click on add kit, we find and select the file HaraldReveryKicks.gkit. Subsequently, we adjust the assignment of notes to individual sounds. Finally, save the preset. | ||
| + | |||
| + | [[File:Fig-16-geonkick-HaraldReveryKicks.png|thumb|center]] | ||
| + | |||
| + | Contains the following sounds: | ||
| + | B-Kick | ||
| + | C-Kick | ||
| + | D-Kick | ||
| + | E-Kick | ||
| + | F-Kick | ||
| + | F-sharp-Kick | ||
| + | G-Kick | ||
| + | |||
| + | === SP Kick Presets vol.1 === | ||
| + | |||
| + | The creator of these sounds is Oleh Bardiuk. There are 17 different kick sounds, for which no kit is created for their number. Later I will show you how to use and load the prepared sound and create your own set. | ||
| + | |||
| + | === TimeKit === | ||
| + | |||
| + | [[File:GeonKIck-Time.ogg|thumb|Pattern on TimeKit]] | ||
| + | |||
| + | The creator of this drum kit is Iurie <https://geonkick.org> | ||
| + | |||
| + | The procedure for loading the kit is the same. So we click on add a kit, we find and select the file TimeKit.gkit. Subsequently, we adjust the assignment of notes to individual sounds. Finally, save the preset. | ||
| + | |||
| + | [[File:Fig-17-geonkick-TimeKit.png|thumb|center]] | ||
| + | |||
| + | Contains the following sounds: | ||
| + | Clap | ||
| + | Hit-Hat-Closed | ||
| + | Hit-Hat | ||
| + | Hit-Hat-Open | ||
| + | Kick | ||
| + | Shaker | ||
| + | Snare | ||
| + | SnareT | ||
| + | |||
| + | === Unfatutorial === | ||
| + | |||
| + | [[File:GeonKick-Unfa.ogg|thumb|Pattern on Unfatutorial Kit]] | ||
| + | |||
| + | The author of this kit is Unfa <https://www.youtube.com/user/unfa00> | ||
| + | |||
| + | The procedure for loading the kit is the same. So we click on add kit, we find and select the file UnfaTutorial.gkit. Subsequently, we adjust the assignment of notes to individual sounds. Finally, save the preset. | ||
| + | |||
| + | [[File:Fig-18-geonkick-UnfaTutorial.png|thumb|center]] | ||
| + | |||
| + | Contains the following sounds: | ||
| + | 808 | ||
| + | Acoustic-Kick | ||
| + | Clap-Snare | ||
| + | Crash Cymbal | ||
| + | DnBKick | ||
| + | Hard-Style-Kick | ||
| + | HH-1 | ||
| + | HH-2 | ||
| + | HH-3 | ||
| + | Metallic Snare | ||
| + | Neuro-Snare | ||
| + | PsyKick | ||
| + | Simple-Snare | ||
| + | |||
| + | == Creating your own Kit == | ||
| + | |||
| + | In this section, I will show how to build your own kit from the available sounds. It is good to have an idea at the beginning of what the kit should contain. In my case, I decided on seven basic sounds. | ||
| + | |||
| + | Kick - I'll use the UnfaTutorial Acoustic-Kick | ||
| + | Snare - I use the UnfaTutorial Metallic-Snare | ||
| + | HiHat Close - I'll use the UnfaTutorial HH-1 | ||
| + | HiHat SemiClose - I'll use the UnfaTutorial HH-3 | ||
| + | Ride - I'll use DigitalSamba Ride | ||
| + | Tom 1 - I will create it from UnfaTutorial Acoustic-Kick | ||
| + | Tom 2 - I will create it from UnfaTutorial Acoustic-Kick | ||
| + | |||
| + | I'll start with a preset that I have funny named ''empty''. | ||
| + | Click the ''Open'' button (circled in yellow) and find the file ''/home/pi/zynthian-my-data/files/geonkick/UnfaTutorial/Acoustic-Kick.gkick'' | ||
| + | |||
| + | [[File:Fig-19-geonkick-preset-1.png|thumb|center]] | ||
| + | |||
| + | The ''Default'' sound has changed to ''Acoustic Drum''. | ||
| + | Click on ''+'' to add another line with ''Default'' sound and click to activate it. | ||
| + | |||
| + | We repeat the described procedure until we gradually select how I have defined the first five sounds. I will also set the note sequence for them, so the result will be as follows: | ||
| + | |||
| + | [[File:Fig-20-geonkick-preset-2.png|thumb|center]] | ||
| + | |||
| + | I copy the ''Acoustic Kick'' onto the last two lines using the copy symbol (circled in blue) and fix the note assignments. I rename ''Acoustic Kick'' to the ''Tom1'' and ''Tom2'' on the last two row. | ||
| + | |||
| + | [[File:Fig-21-geonkick-preset-3.png|thumb|center]] | ||
| + | |||
| + | Now it will be about adjusting the sound synthesis parameters. I'll select ''Tom1'' first and use the Control button to switch to the sound settings. | ||
| + | |||
| + | [[File:Fig-22-geonkick-preset-4.png|thumb|center]] | ||
| + | |||
| + | I will make simple adjustments. In ''level 1 L1'' I adjust the amplitude and frequency to higher values. I can influence the course of the amplitude in the time by shifting the points in the graph. By clicking on the frequency button, I get to edit the frequency course over time, see the following image. | ||
| + | |||
| + | [[File:Fig-23-geonkick-preset-5.png|thumb|center]] | ||
| + | |||
| + | Finally, I will save the resulting sound. I prepared a subdirectory for my sounds and kits beforehand ''/home/pi/zynthian-my-data/files/geonkick/ToFF'', which I find and save the ''Tom1'' sound in. | ||
| + | |||
| + | I repeat the same procedure for the Tom2 sound. | ||
| + | |||
| + | The kit prepared in this way we can save. Using the Kit button, I switch to the environment for working with a set of sounds. Click on the kit save symbol (in an yellow circle on fig.). Choose the directory and write the name of the kit and save. | ||
| + | |||
| + | [[File:Fig-24-geonkick-DrumKit1-save.png|thumb|center]] | ||
| + | |||
| + | In order to have this kit ready for selection in the Zynthian environment, I still need to save the LV2 preset. Select ''Save'' from the ''Preset'' menu, name it and save it. Do not change the directory, it should always be ''/home/pi/zynthian-my-data/preset/lv2'', because Zynthian searches there for newly saved presets. | ||
| + | |||
| + | [[File:Fig-25-geonkick-preset-save.png|thumb|center]] | ||
| + | |||
| + | Don't forget to update the list of available presets for LV2 plugins now. | ||
| + | |||
| + | It is good to prepare several presets like this, because the last step is the longest. | ||
| + | You have to within web browser on ''htpps://zynthian.local'', navigate to webconf ''SOFTWARE->LV2 Plugins'' | ||
| + | Click the ''Search for new Plugins & Presets'' button | ||
| + | Wait, take a cafe, a few minutes and Zynthian must restart automatically (image stable 24-01). | ||
| + | |||
| + | [[File:find-presets.png|thumb|center]] | ||
| + | |||
| + | After this you will have saved presets available in Zynthian UI. | ||
| + | |||
| + | [[File:Fig-26-geonkick-preset-select.png|thumb|center]] | ||
| + | |||
| + | [[File:Geokick-drumkit1.ogg|thumb|center|Some sound of new DrumKit1]] | ||
| + | |||
| + | == Remark on the end == | ||
| + | This text was created as part of a discussion of the Zynthian project. There are also experiences with other drum programs in the [https://discourse.zynthian.org/t/lets-drum/9291 Let's drum thread]. | ||
| + | With love to all Zynthianists, ToFF Tomas Kubina | ||
Latest revision as of 12:15, 29 March 2024
1 Description
Geonkick is a free software synthesizer capable of generating a wide range of percussive sounds, including kicks, snares, claps, hi-hats, shakers, and also unique effect sounds.
- LV2, VST3, Standalone
- 16 Instruments
- 16 Stereo Channels
- 3 Layers/Instrument, 2 Oscillators/Layer
- Play, modify & blend samples with synthesis
- Save (JSON) & Export (FLAC, WAV, Ogg, SFZ)
Project webside: https://geonkick.org/
Source: github.com https://github.com/Geonkick-Synthesizer/geonkick/tree/main
Manual: https://geonkick.org/media/Geonkick_User_Guide.pdf
2 Features
- Kit
- 16 instruments
- user configurable MIDI key mapping for instruments
- Save / Load kit in JSON format
- Export instrument kit to SFZ
- Multichannel
- 16 stereo audio output channels for plugin (1 stereo for standalone)
- user configurable mapping of kit instrument to output channels
- 16 input MIDI channel, user configurable mapping of instruments to MIDI input channels
- 3 layers
- Layers Mixer
- 2 oscillators per layer
- sine, square, triangle, saw-tooth, sample (wav, ogg, flac)
- initial phase control
- amplitude, frequency and sample pitch shift envelope
- low, band and high pass filter, cutoff envelope
- FM synthesis
- OSC1->OSC2
- One noise generator per layer
- white & brownian
- random seed
- amplitude envelope
- low, band and high pass filter, cutoff envelope
- General
- amplitude envelope & kick length
- low & high pass filter, cutoff envelope
- limiter
- compression
- distortion
- distortion drive envelope
- distortion volume envelope
- tune percussion option (relative to key A4)
- Key velocity sensitive for instrument total output amplitude
- Jack support
- Export
- mono, stereo
- WAV: 16, 24, 32 bit
- FLAC: 16, 24 bit
- Ogg
- Open & Save presets in JSON format
3 First power on of GeonKick
First, check if you have the Geonkick LV2 plugin activated. Via webconf at https://zynthian.local go to the menu SOFTWARE / LV2-Plugins and then MIDI Synth. Select Geonkick and confirm the selection by clicking the SAVE button at the bottom of the page.
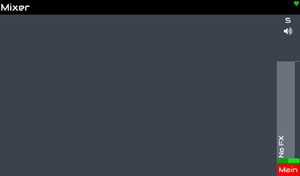
Now we can make chain with Geonkick since we will have it in the menu.
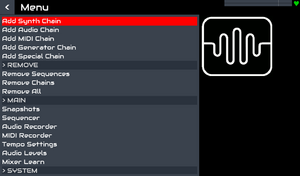
We must go to the main menu and select Add Synth Chain
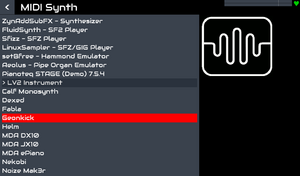
In next step select Geonkick
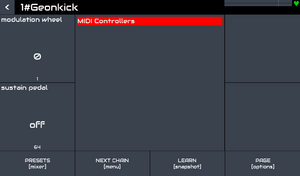
After selection of midi channel you are in Zynthian UI of Geonkick
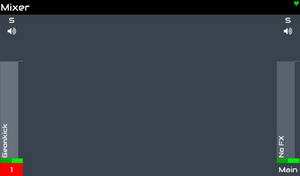
After back to main mixer page you see Geonkick without preset.
Now you need to set up to work in GeonKick's natural GUI
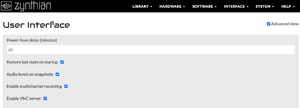
Turning on VNC check and SAVE button on the bottom of page in first
Zynthian restarts its UI.
Now it's time to work in the natural GUI of Geonkick
In webconf https://zynthian.local go to a menu Interface / VNC - Engines -> this opens a new window with connection to the Synth Engine Native GUIs. Click on Connect and fill password raspberry and push enter key.
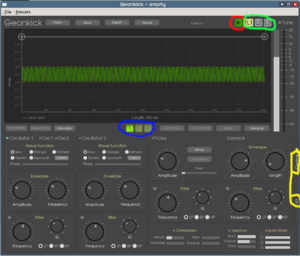
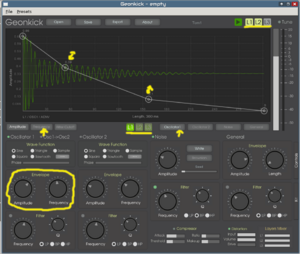
We get to the natural GUI of Geonkick. I circled area of the inportant parts in figures.
Use the Play button (in red) to play a specific sound. The resulting sound can be composed of up to three levels. You can turn on the levels with the L1, L2 and L3 buttons (in the blue circle).
Each level contains two oscillators, for which you can choose the shape of the wave function or even record a sample with a maximum length of 4 s. You can influence the course of the oscillator with Amplitude and Frequencies, or you can also switch on a filter for each. Furthermore, Oscillator1 can control Oscillator2. You can then add white or brown noise to the layer level and also use another filter. At the overall General level, you can then influence the overall Amplitude and duration of the sound. Optionally, the overall filter, turn on compression and distortion and define the ratio of individual levels L1, L2 and L3.
In the upper part, there is a graphic display of the sound progression for a specific oscillator of the selected level. Here you can influence the course of the amplitude, frequency and filter over time. If it is a straight line at 100% there is no influence. But you can move points or add more by right-clicking and reduce the amplitude at that time. You can also modulate the frequency in time and the same applies to the filter frequency. The selected value in the settings is taken as 100% and you influence it downwards.
There are a lot of tutorials on youtube for how to create sounds in GeonKick. Try going through, for example, these:
https://www.youtube.com/watch?v=EtWSnbmdB9w https://www.youtube.com/watch?v=_eXcQef_mSQ https://www.youtube.com/watch?v=WnxUgDoOriQ https://www.youtube.com/watch?v=qQkAIzF9qnY https://www.youtube.com/watch?v=z4UZyuihH2s https://www.youtube.com/@Geonkick/videos
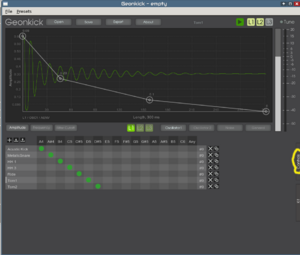
We probably won't be sound masters right away who start creating our own sounds, but we'll break away from some available pre-made sounds. For this, it is good to know that you can switch between the Controls and Kit options, which I have indicated with a yellow area.
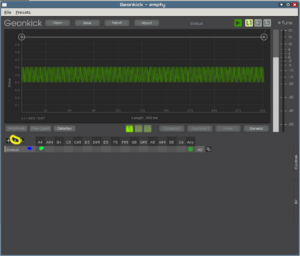
Switching to the Kit settings GUI shows the following
Click the + next to the yellow circle to add another sound to the kit. By double-clicking on the area of the blue dot, i.e. on the name of the sound, you will be able to overwrite it. So by clicking on the cell with the green dot, you assign a specific note to play the given sound. If you select the ANY option, the sound will be played on any note, which is not exactly the best choice. At the end, I left the option to upload a prepared Kit of sounds, i.e. the symbol circled in yellow. Before you press it, you need to prepare the sounds and upload them to Zynthian.
4 Preparing and uploading sounds to Zynthian
I searched the internet for available kits and sounds for GeonKick and the only source is right on github repository. They are not installed in Zynthian stable 24-01 ( I couldn't find them), so we have to get them into Zynthian. I recommend the following procedure:
- download the *.tar.xz files from the repository https://github.com/Geonkick-Synthesizer/geonkick/tree/main/presets
- extract them to the directory.in your PC. I used my favorite directory zynthian-my-data-for-clear-installation/files/geokick/ for example. Each tar.xz file creates a kit's subdirectory.
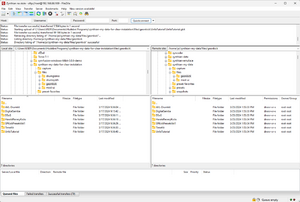
- copy from the source on the PC to the directory /home/pi/zynthian-my-data/files/geonkick. You can use sfpt or ssh with scp. I use FileZilla for convenience, see image.
So we have the necessary files in Zynthian and I can go back to creating presets
5 Creation of presets from recorded kits
Let's show you how to get premade kits into GeonKick. I will proceed alphabetically and we will show the basics on the AVL DrumKit. The procedure is the same for all kits.
5.1 AVL DrumKit
AVL DrumKit was made by Iurie https://geonkick.org and is based on AVL Drumkits samples http://www.bandshed.net/avldrumkits/
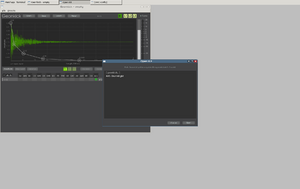
After clicking on the kit upload symbol, in the last picture I have marked it in a yellow circle, a dialog box will appear and you need to click through to the directory /home/pi/zynthian-my-data/files/geonkick/AVL-Drumkit.
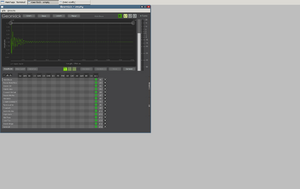
There is only the AVL-Drumkit.gkit file in that directory, which we will select. By the way, this file is 16MB because it contains sampled drum sounds. We will confirm its selection and all 16 lines will be filled in the table of sounds, i.e. the jit has the maximum number of sounds. The green dots are in the ANY column, which is not the right choice for midi playback.
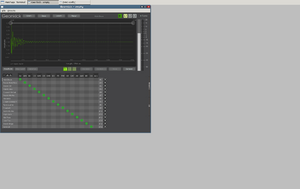
So let's redial the notes for the individual drum sounds. By the way, starting from A4 is quite high compared to standard mappings for drums. In this version it is not possible to select other notes, versions 3.x.x allow this. So I simply clicked through each line in turn to the correct form as is in the picture.
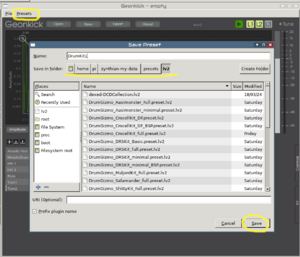
We will already save the result in the preset. From the window menu, select Preset and then Save. Fill in the name of the preset and save.
All that's left is the audio demo, I used the same pattern as in the demos for DrumGizmo
5.2 DigitalSamba
The creator of this kit is Bart Brouns <https://magnetophon.nl>.
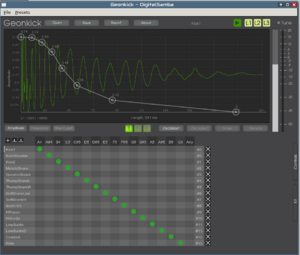
The procedure for loading the kit is the same. So I click on add a kit, we find and select the file DigitalSamba.gkit. Subsequently, we adjust the assignment of notes to individual sounds. Finally, save the preset.
The kit contains the following sounds
 Kick1
 Kick1Double
 Kick2
 Metallic Snare
 GunShotSnare
 ThumpSnareL
 ThumpSnareR
 SoftSnareLow
 SoftSnareHi
 Anvil-HH
 OpenHH
 HiSurdo
 LowSurdo
 LowSurdoDouble
 Cowbell
 Ride
5.3 DSoS Kit
The creator of this kit is Dark Side of Synth <https://darksideofsynth.com>
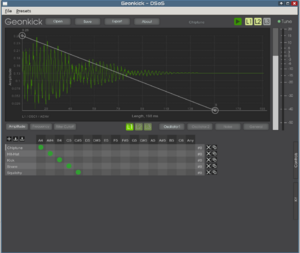
The procedure for loading the kit is the same as for ALV DrumKit. So we click on add a kit, we find and select the DSos.gkit file. Subsequently, we adjust the assignment of notes to individual sounds. In the last step, we save the preset.
The kit contains the following sounds
 Chiptune
 Hi-Hat
 Kick
 Snare
 Squilches
5.4 HaraldReveryKicks
The creator of this kit is Harald Revery <https://haraldrevery.bio.link> It is not a drum kit in the standard sense, but a set of differently tuned kicks.
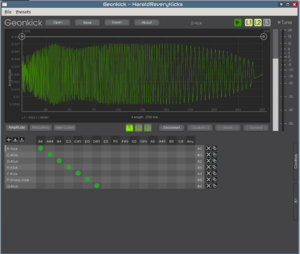
The procedure for loading the kit is the same. So we click on add kit, we find and select the file HaraldReveryKicks.gkit. Subsequently, we adjust the assignment of notes to individual sounds. Finally, save the preset.
Contains the following sounds:
    B-Kick
    C-Kick
    D-Kick
    E-Kick
    F-Kick
    F-sharp-Kick
    G-Kick
5.5 SP Kick Presets vol.1
The creator of these sounds is Oleh Bardiuk. There are 17 different kick sounds, for which no kit is created for their number. Later I will show you how to use and load the prepared sound and create your own set.
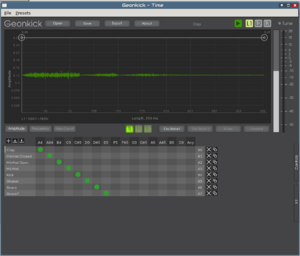
5.6 TimeKit
The creator of this drum kit is Iurie <https://geonkick.org>
The procedure for loading the kit is the same. So we click on add a kit, we find and select the file TimeKit.gkit. Subsequently, we adjust the assignment of notes to individual sounds. Finally, save the preset.
Contains the following sounds:
  Clap
  Hit-Hat-Closed
  Hit-Hat
  Hit-Hat-Open
  Kick
  Shaker
  Snare
  SnareT
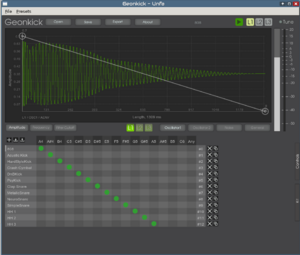
5.7 Unfatutorial
The author of this kit is Unfa <https://www.youtube.com/user/unfa00>
The procedure for loading the kit is the same. So we click on add kit, we find and select the file UnfaTutorial.gkit. Subsequently, we adjust the assignment of notes to individual sounds. Finally, save the preset.
Contains the following sounds:
  808
  Acoustic-Kick
  Clap-Snare
  Crash Cymbal
  DnBKick
  Hard-Style-Kick
  HH-1
  HH-2
  HH-3
  Metallic Snare
  Neuro-Snare
  PsyKick
  Simple-Snare
6 Creating your own Kit
In this section, I will show how to build your own kit from the available sounds. It is good to have an idea at the beginning of what the kit should contain. In my case, I decided on seven basic sounds.
 Kick - I'll use the UnfaTutorial Acoustic-Kick
 Snare - I use the UnfaTutorial Metallic-Snare
 HiHat Close - I'll use the UnfaTutorial HH-1
 HiHat SemiClose - I'll  use the UnfaTutorial HH-3
 Ride - I'll  use DigitalSamba Ride
 Tom 1 - I will create it from UnfaTutorial Acoustic-Kick
 Tom 2 - I will create it from UnfaTutorial Acoustic-Kick
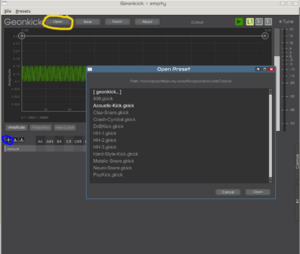
I'll start with a preset that I have funny named empty. Click the Open button (circled in yellow) and find the file /home/pi/zynthian-my-data/files/geonkick/UnfaTutorial/Acoustic-Kick.gkick
The Default sound has changed to Acoustic Drum. Click on + to add another line with Default sound and click to activate it.
We repeat the described procedure until we gradually select how I have defined the first five sounds. I will also set the note sequence for them, so the result will be as follows:
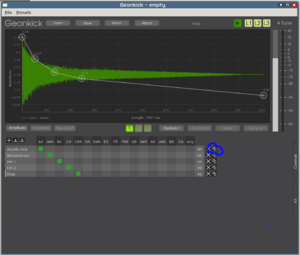
I copy the Acoustic Kick onto the last two lines using the copy symbol (circled in blue) and fix the note assignments. I rename Acoustic Kick to the Tom1 and Tom2 on the last two row.
Now it will be about adjusting the sound synthesis parameters. I'll select Tom1 first and use the Control button to switch to the sound settings.
I will make simple adjustments. In level 1 L1 I adjust the amplitude and frequency to higher values. I can influence the course of the amplitude in the time by shifting the points in the graph. By clicking on the frequency button, I get to edit the frequency course over time, see the following image.
Finally, I will save the resulting sound. I prepared a subdirectory for my sounds and kits beforehand /home/pi/zynthian-my-data/files/geonkick/ToFF, which I find and save the Tom1 sound in.
I repeat the same procedure for the Tom2 sound.
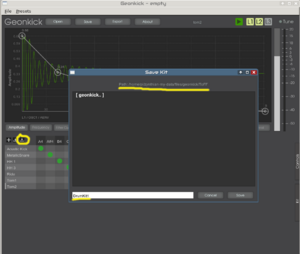
The kit prepared in this way we can save. Using the Kit button, I switch to the environment for working with a set of sounds. Click on the kit save symbol (in an yellow circle on fig.). Choose the directory and write the name of the kit and save.
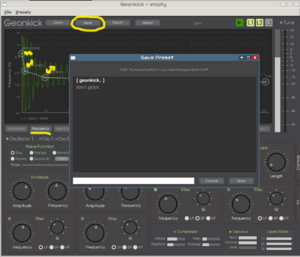
In order to have this kit ready for selection in the Zynthian environment, I still need to save the LV2 preset. Select Save from the Preset menu, name it and save it. Do not change the directory, it should always be /home/pi/zynthian-my-data/preset/lv2, because Zynthian searches there for newly saved presets.
Don't forget to update the list of available presets for LV2 plugins now.
It is good to prepare several presets like this, because the last step is the longest. You have to within web browser on htpps://zynthian.local, navigate to webconf SOFTWARE->LV2 Plugins Click the Search for new Plugins & Presets button Wait, take a cafe, a few minutes and Zynthian must restart automatically (image stable 24-01).
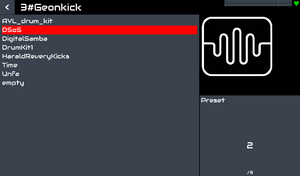
After this you will have saved presets available in Zynthian UI.
7 Remark on the end
This text was created as part of a discussion of the Zynthian project. There are also experiences with other drum programs in the Let's drum thread. With love to all Zynthianists, ToFF Tomas Kubina
