Difference between revisions of "Zynthian Software"
| Line 10: | Line 10: | ||
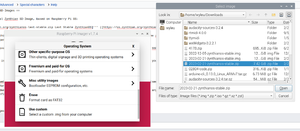
[[File:Imager.png|thumb]] | [[File:Imager.png|thumb]] | ||
A raspberry Pi desktop instance will unzip from the file manager and provides the Imager application to write the SSD... | A raspberry Pi desktop instance will unzip from the file manager and provides the Imager application to write the SSD... | ||
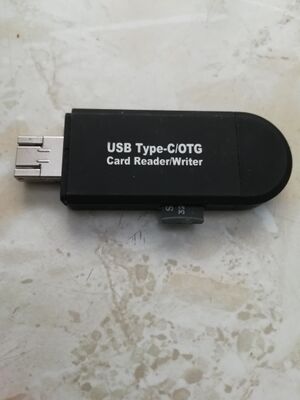
| − | [[File:Usbssdwriter.jpg|thumb | + | [[File:Usbssdwriter.jpg|thumb]] |
You will require a SSD Writer, but this task can be completed with only the raspberry Pi you are using for the zynthian with a little ssd disk swapping. | You will require a SSD Writer, but this task can be completed with only the raspberry Pi you are using for the zynthian with a little ssd disk swapping. | ||
| + | <br> | ||
| − | |||
Revision as of 12:31, 18 March 2023
1 Official ZynthianOS SD-Images
This is the last official Zynthian SD-Image, based on Raspberry Pi OS:
Last Stable ZynthianOS (MD5-sum)
You will need to unzip this file to provide an .img file that can be 'burnt' to an SSD disk that is bootable in the zynthian machine. This process differs depending on the Operating system you use for Internet access.
A raspberry Pi desktop instance will unzip from the file manager and provides the Imager application to write the SSD...
You will require a SSD Writer, but this task can be completed with only the raspberry Pi you are using for the zynthian with a little ssd disk swapping.
Note:
This SD-image is pre-configured for official kits v4 & v3. If you are using a different hardware, your first step should be accessing the webconf and configuring your hardware.
1.1 Instructions
- For accessing to the webconf tool, see here
- Once logged in go to Hardware -> Kit and select "Custom" then click on save button
- Then, stil in the Hardware menu, configure each device: Audio, Display, Wiring (use "Dummies" if you do not use any encoder/switch). Don't forget to save your configuration after each step.
- When everything is configured, you can reboot Zynthian using the System -> Reboot menu item
2 Preparing the SD-card
Current images are 8 GB compressed image file compiled for Raspberry Pi 3. These SD card images include all the Zynthian software, properly configured for working with the official kits. Completely ready to use. Plug and play!
After downloading the SD-image, you have to write it to a SD-card. You need a SD card with a minimum size of 16GB, although you can use a bigger one if you want.
Use Etcher (free software works on Mac, Windows or Linux) to write the image onto the SDcard. Or do it manually! There is a really good manual for this at this link.
Note:
RBPi2 is not currently supported by the latest official zynthian SD images, so if you want to use a RBPi2, you may need to build your own SD image.
3 Build your own image
If you like, you can build your own SD image following these instructions:
Building the SD Image using the Setup Script
Also, you would like to try the new docker-builder (thanks @guysoft!!):
Building Zynthian with Docker

