Difference between revisions of "Zynthian UI User Guide (oldstable-2109)"
| Line 449: | Line 449: | ||
==Step Sequencer== | ==Step Sequencer== | ||
| − | |||
| − | Zynthian has a step sequencer which provides | + | Zynthian has a step sequencer which provides methods to create patterns and arrange them into sequences. |
| − | + | There are three main views: | |
| − | |||
| − | |||
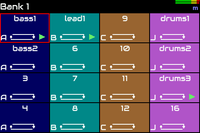
| − | + | [[File:Zynpad 4x4 playing starting.png|left|200px]] | |
| + | ZynPad: Grid of pads to launch sequences | ||
| + | <br clear=all> | ||
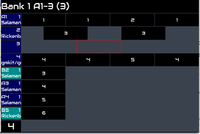
| + | [[File:Arranger.png|left|200px]] | ||
| + | Arranger: Track / timeline editor for complex manipulation of sequences | ||
| + | <br clear=all> | ||
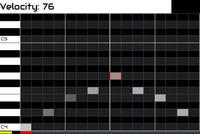
| + | [[File:Zynseq patterneditor notevelocity.png|left|200px]] | ||
| + | Pattern Editor: Manipulation of individual events within patterns | ||
| + | <br clear=all> | ||
| − | + | The step sequencer may be accessed from the main Zynthian screen or by a long press of the LAYER encoder. There may be up to 999 patterns each with as many simultaneous notes (polphonic) as required over a set of steps and beats that are configurable for each pattern. Patterns are arranged into tracks within sequences. Sequences may be configured to loop or play once and may be grouped so that starting one sequence stops another. Sequences may start and stop at the start of each bar. Note entry can be performed from the Zynthian user interface or using an external MIDI controller. Sequences can be started and stopped from the Zynthian user interface or using an external MIDI controller. | |
| − | |||
| − | |||
| − | |||
| − | |||
| − | + | [[Using ZynSeq]] is a detailed tutorial on the use of the step sequencer. | |
| − | |||
| − | |||
| − | |||
| − | |||
| − | |||
| − | |||
| − | |||
| − | |||
| − | |||
| − | |||
| − | |||
| − | |||
| − | |||
| − | |||
| − | |||
| − | |||
| − | |||
| − | |||
| − | |||
| − | |||
| − | |||
| − | |||
| − | |||
| − | |||
| − | [[ | ||
| − | |||
| − | |||
| − | |||
| − | |||
| − | |||
| − | |||
| − | |||
| − | |||
| − | |||
| − | |||
| − | |||
| − | |||
| − | |||
| − | |||
| − | |||
| − | |||
| − | |||
| − | |||
| − | |||
| − | |||
| − | |||
| − | |||
| − | |||
| − | |||
| − | |||
| − | |||
| − | |||
| − | |||
| − | |||
| − | |||
| − | |||
| − | |||
| − | |||
| − | |||
| − | |||
| − | |||
| − | |||
| − | |||
| − | |||
| − | |||
| − | |||
| − | |||
| − | |||
| − | |||
| − | |||
| − | |||
| − | |||
| − | |||
| − | |||
| − | |||
| − | |||
| − | |||
| − | |||
| − | |||
| − | |||
| − | |||
| − | |||
| − | |||
| − | |||
| − | |||
| − | |||
| − | |||
| − | |||
| − | |||
| − | |||
| − | |||
| − | |||
| − | |||
| − | |||
| − | |||
| − | |||
| − | |||
| − | |||
| − | |||
| − | |||
| − | |||
| − | |||
| − | |||
| − | |||
| − | |||
| − | |||
| − | |||
| − | |||
| − | |||
| − | |||
| − | |||
| − | |||
| − | |||
| − | |||
| − | |||
| − | |||
| − | |||
| − | |||
| − | |||
| − | |||
| − | |||
| − | |||
| − | |||
| − | |||
| − | |||
| − | |||
| − | |||
| − | |||
| − | |||
| − | |||
| − | |||
| − | |||
| − | |||
| − | |||
| − | |||
| − | |||
| − | |||
| − | |||
| − | |||
| − | |||
| − | |||
| − | |||
| − | |||
| − | |||
| − | |||
| − | |||
| − | |||
| − | |||
| − | |||
| − | |||
| − | |||
| − | |||
| − | |||
| − | |||
| − | |||
| − | |||
| − | |||
| − | |||
| − | |||
| − | |||
| − | |||
| − | |||
| − | |||
| − | |||
| − | |||
| − | |||
| − | |||
| − | |||
| − | |||
| − | |||
| − | |||
| − | |||
| − | |||
| − | |||
| − | |||
| − | |||
| − | |||
| − | |||
| − | |||
| − | |||
| − | |||
| − | |||
| − | |||
| − | |||
| − | |||
| − | |||
| − | |||
| − | |||
| − | |||
| − | |||
| − | |||
| − | |||
| − | |||
| − | |||
| − | |||
| − | |||
| − | |||
| − | |||
| − | |||
| − | |||
| − | |||
| − | |||
| − | |||
| − | |||
| − | |||
| − | |||
| − | |||
| − | |||
| − | |||
| − | |||
| − | |||
| − | |||
| − | |||
| − | |||
| − | |||
| − | |||
| − | |||
| − | |||
| − | |||
| − | |||
| − | |||
| − | |||
| − | |||
| − | |||
| − | |||
| − | |||
| − | |||
| − | |||
| − | |||
| − | |||
| − | |||
| − | |||
| − | |||
| − | |||
| − | |||
| − | |||
| − | |||
| − | |||
| − | |||
| − | |||
| − | |||
| − | |||
| − | |||
| − | |||
| − | |||
| − | |||
| − | |||
| − | |||
| − | |||
| − | |||
| − | |||
| − | |||
| − | |||
| − | |||
| − | |||
| − | |||
| − | |||
| − | |||
| − | |||
| − | |||
| − | |||
| − | |||
| − | |||
| − | |||
| − | |||
| − | |||
| − | |||
| − | |||
| − | |||
| − | |||
| − | |||
| − | |||
| − | |||
| − | |||
| − | |||
| − | |||
| − | |||
| − | |||
| − | |||
| − | |||
| − | |||
| − | |||
| − | |||
| − | |||
| − | |||
| − | |||
| − | |||
| − | |||
| − | |||
| − | |||
| − | |||
| − | |||
| − | |||
| − | |||
| − | |||
| − | |||
| − | |||
| − | |||
| − | |||
| − | |||
| − | |||
| − | |||
| − | |||
| − | |||
| − | |||
| − | |||
| − | |||
| − | |||
| − | |||
| − | |||
| − | |||
| − | |||
| − | |||
| − | |||
| − | |||
| − | |||
| − | |||
| − | |||
| − | |||
==Admin Menu== | ==Admin Menu== | ||
Revision as of 13:56, 19 February 2021
1 General Concepts
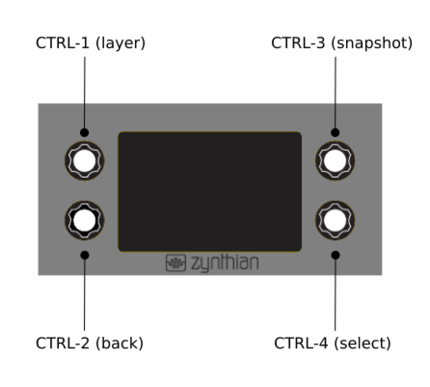
The Zynthian UI is displayed on a display and controlled by 4 knobs (rotary-encoders with push-switches). You can also control the UI with a touch-display, a mouse or a keyboard (computer keyboard or MIDI keyboard, both!)
Anyway, the 4 knobs+switches are the primary control mechanism used to navigate the UI: selecting options on menus and adjust the instrument parameters. The knobs can act as assignable MIDI/OSC controllers for the instrument's parameters (frequently lots of them!). You can emulate the knob's behavior using the touch-display, but it's sub-optimal and accessing some features could be tricky.
There are two main screen-layout types:
- Selector Screen: a list of items that you can scroll and select with the SELECT knob (CTRL-4)
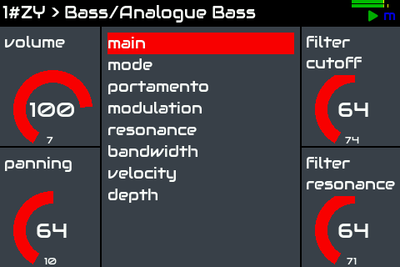
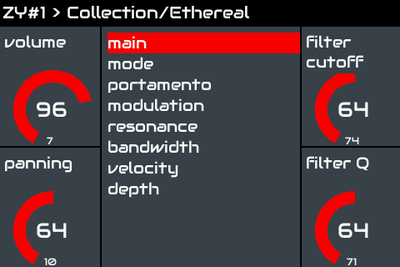
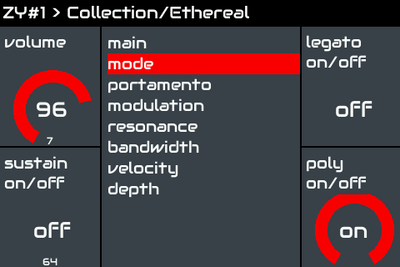
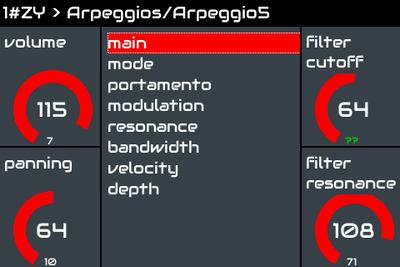
- Controller Screen: 4 control widgets in the corners (one for each knob), with label and value indicators (graphic and numeric). In the middle there is a list of controller maps, which you can use to change the parameters controlled by the knobs.
Almost every Zynthian UI screen is of one of these 2 types, however, other screen-layouts do exist:
- Confirmation Screen: It will ask you to confirm some operation.
- XY Controller Screen: It allows to modify 2 parameters at once using the touch interface.
- Info Screen: It displays info about an operation, like "Update Software", or "Network Info"
There are 3 types of clicks (push-switch actions) that can be performed, depending on how long you hold down the knob (or hold your finger on the touch-display).
- short click: less than 0.3 seconds
- bold click: between 0.3 and 2 seconds
- long click: more than 2 seconds
These timing values are the default ones. You can adjust them to your personal feeling from the UI options on the webconf tool.
Click actions for each knob are context dependent. The SELECT knob is mainly used to navigate, and a short click on it will select an item on a "Selector Screen". Inside a "Controller Screen", short clicks can be used to rotate between layers (LAYER knob) or between controller pages (SELECT knob). "Bold-clicks" are intended as shortcuts for jumping to some specific screens. Clicking the BACK knob generally jumps to the previous screen in the workflow sequence.
Most of the actions depend of context (current screen), but there are some actions that are global and will work from any screen:
- bold-back: Main menu
- bold-snapshot: Load Snapshot menu
- long-layer: ALSA Mixer app
- long-back: Admin menu
- long-snapshot: Step Sequencer
- long-select: Power Off
Note that in older versions of Zynthian OS long-back was bound to 'PANIC! All Notes Off'. It is now recommended you bind this to S1-4.
2 The Title Bar
The title bar have 2 functions:
- Kind of Breadcrumb, normally showing the screen title or layer information: MIDI channel, engine, bank & preset
- Back-button, when using the touch-interface. I know, it's far from intuitive, but Zynthian-UI was not designed with touch-navigation in mind.
3 The Status Area
On the top-right corner there is a small area where some useful information is displayed in real time:
- Audio Peak-meter or CPU-load => 1 or 2 small horizontal bars on the top right.
- MIDI-IN => Blue M flag
- Xrun => Red Warning flag
- Under-voltage => Red Lightning flag
- Over-temperature => Red Thermometer flag
- Recording Audio => Red Circle flag
- Playing Audio => Green Play flag
3.1 The Peak-meter
The Audio Peak-meter is shown by default. The meter covers the range -50dBFS to 0dBFS, i.e. maximum permissible level at full scale (far right) down to 50dB below (far left):
- The green segment covers the range -50dBFS to -10dBFS.
- The yellow segment covers the range -10dBFS to -3dBFS.
- The red segment covers the range -3dBFS to 0dBFS.
There are independent meters for left and right channels which monitor the system output, i.e. the mix of audio that feeds the Zynthian output. Level decays with a logarithmic rule, taking one second to decay to -200dBFS so will decay to -50dBFS (the displayed range) in about quarter of a second. Peaks are displayed instantly, i.e. the attack of the meter is immediate(*). The peak hold bar remains for two seconds or until a higher peak is reached.
(*) Meter is updated 5 times per second so there can be 200 ms delay in peak being displayed.
Alternately, CPU-load bar can be enabled from webconf, replacing the Audio Peak-meter. The CPU-load bar shows the CPU usage as calculated by the Jack Audio Server:
This is a running average of the time it takes to execute a full process cycle for all clients as a percentage of the real time available per cycle determined by the buffer size and sample rate.
3.2 The Flags
- The Blue M flag is shown when MIDI messages pass thru the MIDI router. Not all messages are detected. Only CC, Program Change and Note On/Off.
- The Red Warning flag is shown when there are Xruns. You should hear clicks and pops too.
- When the Red Lightning or Red Thermometer flag is shown, your zynthian is working in a degraded state, with the CPU frequency capped to 600-800 MHz, trying to stabilize the system and avoid a system crash. You shouldn't see any of them and if you do so, you should consider looking for a better power source (under-voltage) or using a heat sink (over-temperature).
- Finally, the Red Circle and Green Play flags show the status of audio/MIDI capture: recording / playing
4 The Zynthian UI Workflow
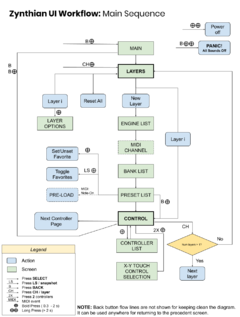
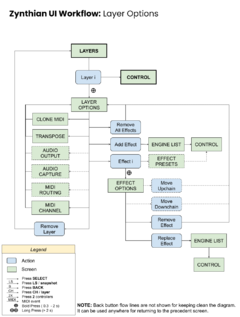
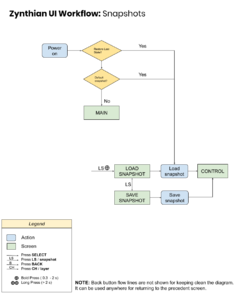
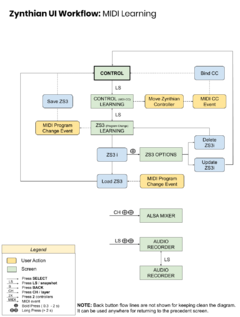
The following flowcharts show the different "screens" or "menus" and how to reach each one using the 4 switches. It would be a good idea to print these flowcharts and keep them near your Zynthian Box until you memorize the workflow.
If you want to contribute to improving these flowcharts, you can edit them using the Google Documents Tools:
- Main sequence: zynthian_ui_workflow_main
- Layer Options: zynthian_ui_workflow_layer_options
- Snapshots: zynthian_ui_workflow_snapshots
- MIDI Learning: zynthian_ui_workflow_midi_learning
5 The UI Screens
5.1 Main
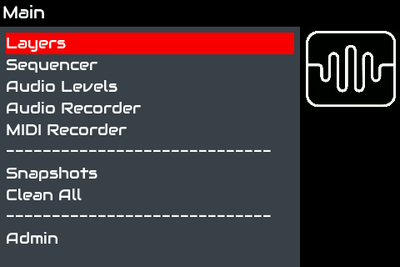
This is the first screen you would see when you power on your zynthian for first time and no default snapshot or last-state snapshot has been saved yet. The Main menu gives easy and intuitive access to the Zynthian-UI's main features:
- Layers
- Snapshots
- Audio Recorder
- MIDI Recorder
- ALSA-Mixer
- Auto-EQ
- Admin
You always can access this menu with bold-back.
The Zynthian-UI has a lot of short-cuts and most of the options on the Main menu can be accessed on this way, but until you learn the shortcuts and feel comfortable with them, you will find this menu very useful.
5.2 Layers
Layers are a key concept on Zynthian-UI: the first thing you do after poweron your zynthian is, probably, create a layer.
A layer is a Processing Chain, normally assigned to a MIDI channel, which can be composed of one or more Audio or MIDI Processing Units. These units are chained in the same order they are created, but you can change the order from the Layer Options menu. The first unit in a layer is the root and it determines the layer's type:
- Synth Layer => Receives MIDI note-events and generate audio output.
- Audio FX Layer => Receives audio-input and generates audio-output.
- MIDI FX Layer => Receives MIDI-input and generates MIDI-output.
- Generator Layer => Auto-generate audio output using an algorithm.
- Special Layer => MOD-UI pedalboard, Pure Data patch, etc.
The root layer can't be re-arranged or changed. When you create pure Audio-FX layers, it's a good idea to use a "Gain" unit as root element, so you can re-arrange/change all the other elements on the chain.
All units in a layer's chain receive all the MIDI events coming from the assigned channel. Some special layers (MOD-UI) don't have an assigned MIDI channel and receive all MIDI channels.
You can access the Layer screen:
- from any place, bold-layer
- from Main menu
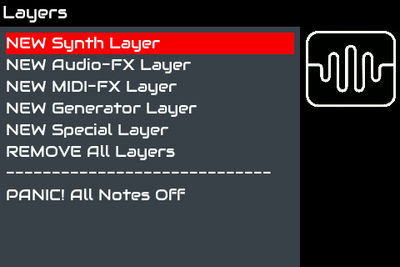
There are several options on the layers screen:
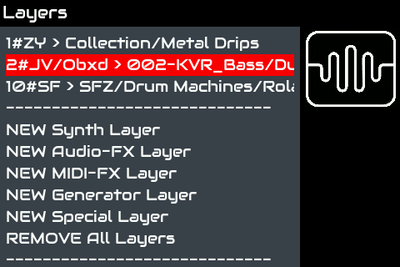
- NEW Synth Layer => Create a Synthesizer Layer.
- NEW Audio-FX Layer => Create an audio-FX Layer that will be connected to soundcard's Audio Capture. You can route the audio output from other layers to the input of an Audio-FX layer.
- NEW MIDI-FX Layer => Create a MIDI-FX Layer to process MIDI events. You can route the MIDI output from a MIDI-FX layer to the MIDI input of any other unit or to the zynthian's MIDI output.
- NEW Generator Layer => Create a new Generator Layer that self-generates audio.
- NEW Special Layer => Create a new Special Layer (MOD-UI, Pure Data, ...).
- REMOVE ALL => Remove all Layers & Effects, returning to the initial state.
- PANIC! All Notes/Sounds Off => Stop All Notes and sounds by sending CC#123 and CC#120 to all channels.
The last option, All Notes/Sounds Off, can be triggered with long-back from any point of the workflow. You can also add a panic-button to your zynthian using the extra pins from the AllInOne circuit or the Zynscreen. Read this for a detailed explanation about how to add a panic button to your Zynthian.
When you select NEW Synth/Effect/Generator/Special Layer, you create a new root-layer (first of a chain), choosing a free MIDI channel for it. You can create up to 16 layers (as many as MIDI channels), each one having an independent effect-chain.
Having several layers in the same MIDI channel is not allowed. If you want two or more layers playing unison (like being in the same MIDI channel), you should use the "Clone" feature, which allow you to bind several layers while keeping MIDI CCs and other MIDI messages (Program Change, Channel Pressure, etc.) independent.
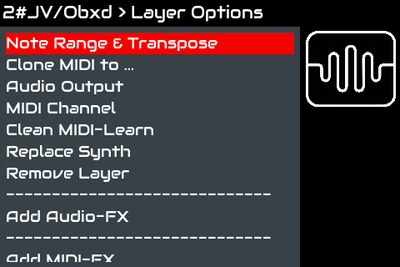
If you bold-click the select switch over a layer from the list, the "Layer Options" menu will be displayed for the selected layer. This menu allows you to:
- Clone MIDI to... => Clone the layer's MIDI channel messages to other MIDI channels. Note that only note on/off, pitch-bending, and key-press messages are cloned, while the rest are kept independent by default (CC, channel-pressure, program change, ...). You can select what CC will be cloned by bold-clicking on the channel list.
- Transpose => Transpose the layer's MIDI channel up and down, by semitones.
- Audio Output => Route the layer's audio output to any available audio input port, allowing to process the audio in almost any way you can imagine. You can use this feature for creating your own customized/bizarre FX chains. If this is not enough for you, try MOD-UI engine with the MOD-UI web GUI. This option is not available on MIDI-FX layers.
- Audio Capture => Select the soundcard's capture channels used for audio processing. This option is only available on Audio-FX layers.
- MIDI Routing => Select the destiny of the layer's MIDI output. This option is only available on MIDI-FX layers.
- MIDI Channel => Change the assigned MIDI Channel.
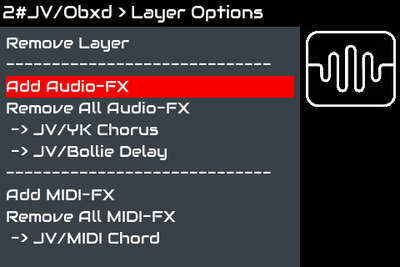
- Remove Layer => Remove the layer, including all chained Audio & MIDI FXs.
- Add Audio-FX => Add an Audio-FX unit to the layer's audio chain.
- Remove All AUdio-FX => Clean the Audio-FX chain, deleting all the audio effect units.
- Audio-FX List => The list of audio effects on the layer's chain.
- Add MIDI-FX => Add a MIDI-FX to the layer's chain. If the layer is a Synth layer, the MIDI-FX will be inserted just before the synth engine.
- Remove All MIDI-FX => Clean the MIDI-FX chain, deleting all the MIDI effect units.
- MIDI-FX List => The list of MIDI effects on the layer's chain.
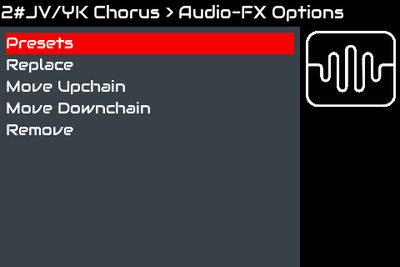
By bold-clicking on an FX-unit (Audio or MIDI) from the list, you will access the FX's Options:
- Replace FX
- Effect Presets
- Move Upchain
- Move Downchain
- Remove FX
Note that not all these options will be available all the time. For instance, if there is only one effect in the chain, "Move" options won't be shown. Same if the FX has not presets, etc.
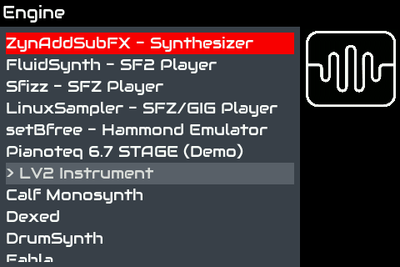
5.3 Engine Selector
When you create a new layer, you are asked which engine/plugin you want to use for it. A list of engines to choose from is displayed. They can be synthesizers, effects, generators or special engines, depending on the type of layer you are creating. When you select an element from the list, the zynthian logo on the top-right will be animated while the engine is being started.
Some engines have special behavior regarding layers and MIDI channels:
- setBfree: This engine can create 1, 2 or 3 layers assigned to the several MIDI channels starting at selected channel, each one corresponding to the upper, lower and pedals sections of the Hammond B3 emulation.
- Pianoteq: Only one layer can be created, assigned to the MIDI channel you choose.
- Aeolus: By default, 4 layers are created, assigned to different MIDI channels (1,2,3 & 4), each one corresponding to the 3 manuals + 1 pedal of the Aeolus default instrument definition. You can change the MIDI channel assignments from the Aeolus native UI. If you want to use a different instrument definition, you will have to tweak the engine's code a little bit.
- MOD-UI: Only one layer of this type is allowed and it will receive ALL MIDI channels. If you want to filter the messages by channel, you can do it within the MOD-UI patch. (There are plans for improving this behavior.)
- PureData: Only one layer of this type is allowed, but it can be assigned to a MIDI channel.
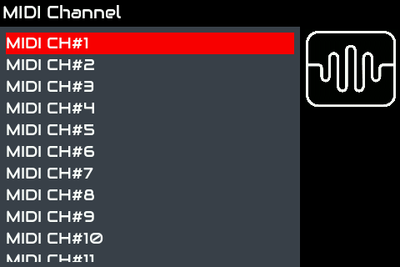
5.4 MIDI Channel selector
This screen is shown in various contexts:
- After you have selected the engine for a new layer. Only free channels are listed.
- When you change the assigned MIDI channel from the Layer Options. Only free channels are listed.
- When you clone a layer from the Layer Options.
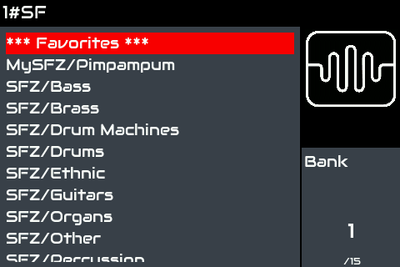
5.5 Bank selector
Presets (instruments, patches, or sound designs) for a synth engine are organized into banks. Choose a bank to see the list of presets you can pick from within that bank.
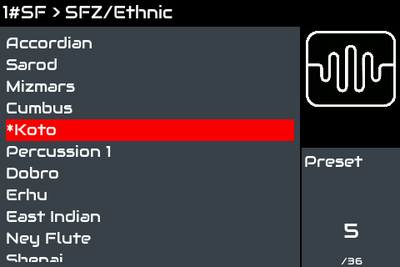
5.6 Preset selector
Once you have chosen a bank, the preset screen will be shown. Choose a preset to load the instrument/sound/patch you want and the Control Instrument screen will be shown.
If the preload with note-on feature is enabled, you can preload the presets by playing notes. When you do so, the highlighted preset will be pre-loaded before clicking select.
You can return to the control screen directly, without selecting any preset, by clicking bold-back. In that case, the previously selected instrument will be restored in case you pre-loaded some preset.
Use bold-select for adding a preset to your favorites. You will see a little * at left. Bold-select again for removing the preset from favorites. For listing only your favorite presets, click snapshot.
5.7 Control screen
This screen is shown after you have chosen a preset. Your instrument is now enabled and playable and you can modify the parameters.
Turning any of the 4 knobs will change the value of the parameter displayed in the boxes adjacent to each knob. You also can use the touch interface to change the values. See below.
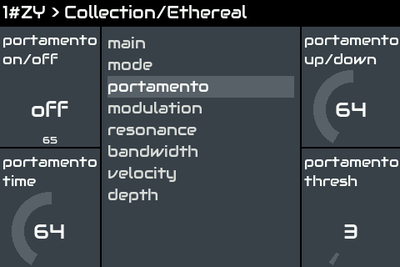
The central list shows the different pages of parameters that you may alter. You can navigate the page of parameters by clicking short-select to step by one page.
If the page list is long, you can "bold click" the select switch to navigate the list using the select knob.
5.7.1 XY-Controller
From the instrument control screen, if you bold-press two knobs at once, you should enter the XY-select mode.
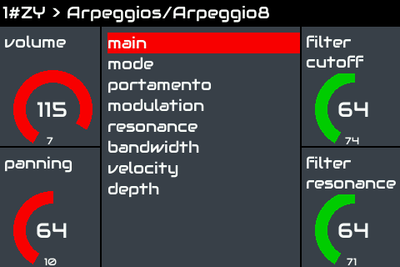
The 2 controllers you pushed will be green, indicating they are pre-selected for XY-control. You can change the pre-selection by rotating any knob, navigating through the controller pages if needed.
Once you have selected the parameters you want, touch the display to enter the XY-control pad and use the touchscreen ala Kaoss-Pad.
Click back to return to XY-select and back again to return to the control screen.
5.8 Load/Save Snapshot
Snapshots are used for saving and restoring the status of Zynthian. A snapshot includes the full state, including layers, effects, parameter values, MIDI-learning, etc.
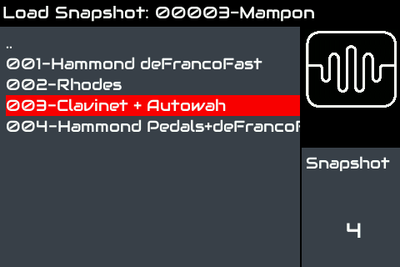
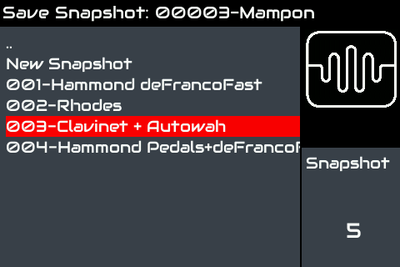
You can enter the Load Snapshot screen with bold-snapshot. It works from any place. A second click and you will be at the Save Snapshot screen.
Before loading any snapshot, you should save one, and to save a snapshot, you should create some layers, etc. The Zynthian UI will use numbers for naming the banks and snapshots. You can rename the snapshots to something more specific using the webconf tool.
5.8.1 Snapshot Banks
By default, snapshots are stored as a single list and bank-related stuff is not shown by Zynthian-UI. If you want to use banks for organizing your snapshots, you simply create a second bank using the webconf tool and the hidden bank functionality will be enabled.
When using snapshot banks, if you want to go up one level (from snapshot list to bank list), you must use the ".." entry. The back button will close the snapshot screen.
5.8.2 Default Snapshot
You can save the status as "Default Snapshot". This "Default Snapshot" will be loaded automatically at startup. To delete it, you can use the webconf tool or the command line.
5.8.3 Restore Last State
If "Restore last state on startup" option is enabled on webconf (it's enabled by default), then the state will be saved when powering off (using long-click select or from Admin Menu) and restored on next boot. This option has priority over the "Default Snapshot".
5.9 MIDI-learning
MIDI-learning allows you to easily bind specific MIDI events with Zynthian-UI actions. There are 2 types of MIDI events you can learn:
5.9.1 MIDI CC
You can map any parameter in the Zynthian UI to a CC knob/slider on your external MIDI controller. I intend to extend this feature to other MIDI messages, but currently only CC messages are supported. Until then, MIDI-filter rules can be used instead.
Learning a MIDI-CC is quite easy:
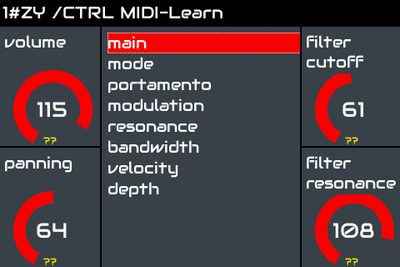
1. From the control screen, you click the snapshot button. You will be in CC MIDI-learn screen. It’s identical to the Control screen except that all the controllers have a tiny yellow “???” in the bottom.
2. Move a zynthian controller. Its tiny “???” will change to green while the other 3 will go back to normal state.
3. Finally, move a knob/fader in your MIDI keyboard/controller and the binding is done. The new CC number should appear in the bottom of the learned controller, replacing the tiny "???".
Of course, MIDI-learning configuration, including CC mappings, is stored and restored with snapshots.
Technical Note: MIDI-CC learning works with all the engines. It uses the engine’s native MIDI-learning capabilities when available. Zynthian’s MIDI-filter mappings are used for the rest. To be more explicit, native MIDI-learning is used for MOD-UI and ZynAddSubFX OSC parameters. All the other parameters are managed by Zynthian’s MIDI-filter mapping.
5.9.2 MIDI Program Change & ZS3 (SubSnapShots)
A ZS3 (SubSnapShot) saves the state of the active layer in the context of the current snapshot (layer layout). When recalled, the saved state is restored and the active layer is changed.
Every ZS3 includes:
   - Layer ID
   - Bank Name
   - Preset Name
   - Controller Values
Once a set of layers has been created (i.e. loading a snapshot), ZS3 loading is very fast in comparison with loading snapshots, as no engine have to be started. It take less than 1 second in most of cases, and you can map ZS3s to MIDI programs very easily using MIDI learning.
The idea behind this feature is to have a fast preset-change mechanism that can be used on stage. In combination with the “Stage Mode” feature, it turns Zynthian into a “Stage-Beast”. You can prepare a snapshot for the full performance, and use ZS3s for fast changes from a song to another, or between parts inside the same song.
Learning to create a SubSnapShot is obscenely easy:
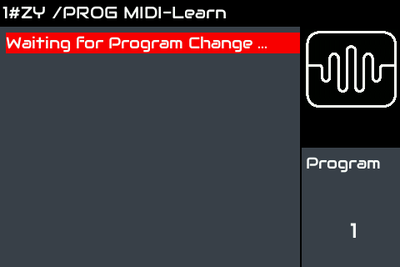
1. From the Control screen, click the snapshot button twice. You will see the current list of ZS3s (initially empty) and a message: “Waiting for Program Change…”
2. Push a “Program Change” button in your keyboard/controller and the ZS3 will be stored in memory, associated with the Program Number you pushed on your keyboard/controller.
After that, you can recall the stored ZS3 by pushing the same Program Change button again. Of course, stored ZS3s will be saved with your snapshot and restored on load.
You can update and delete stored ZS3s by bold-clicking on the list.
ZS3 behavior depends of the mode your zynthian is working on:
- Stage Mode: ZS3 list shows all the ZS3s stored, no matter the layer. Recalling a ZS3 changes the active layer, so the layer associated with the recalled ZS3 will receive *ALL* the MIDI input. Only 127 ZS3s can be stored.
- Multi-timbral Mode: ZS3 list shows the ZS3 of the currently active layer only. Recalling a ZS3 changes the active layer, but every layer receives MIDI input from its channel. You can use several keyboards on different channels and store 127 ZS3s by MIDI channel.
5.10 Audio & MIDI Recording
5.10.1 Overview
These simple tools allow you to record Audio & MIDI tracks easily, using the internal SD-card or an USB memory stick for storing the files.
It's also used when you want a quick way to upload sound samples to websites via the webconf component detailed below...
Most sites would prefer you to upload compressed files and oggs are perhaps the way forward . . .
For accessing the Audio & MIDI recording tools:
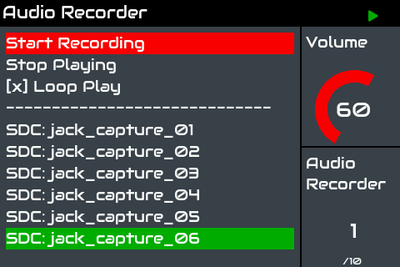
- From the Main menu, select Audio Recorder
- From any place, long-snapshot
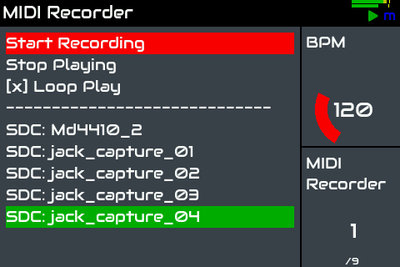
When you are in, short-snapshot for switching between Audio & MIDI Recorder.
WARNING! Using the internal SD card to store the captured files will increase the risk of corruption. You should use a USB memory stick instead.
5.10.2 Recording
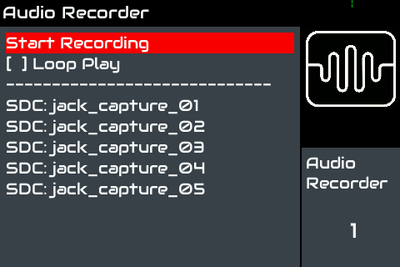
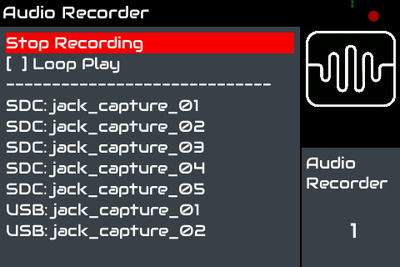
1. Press "Start Recording" to start a new capture.
2. The red circle should appear in the top-right status area, indicating that a recording is going on.
3. Press "Stop Recording" for finishing the capture. The red circle will disappear and the recorded file will be added to the list. The filename is generated automatically and should be something like "jack_capture_01". The prefix "SDC" or "USB" indicates where the file is stored.
5.10.3 Playing
You can play files by simply selecting and clicking the file. The "play" symbol will be displayed in the UI status area. For looping the file, turn on the "Loop Play" switch before playing.
NOTE: You can play a file at any moment. Recording and playing can take place simultaneously.
When playing audio, a volume control will be shown. When playing MIDI, a BPM control will be shown for adjusting the transport speed.
Recording audio & playback MIDI are transport-bond. If you stop recording audio while playing MIDI, MIDI play will stop, but MIDI playback will remain enabled, so when starting a new audio record, the MIDI playback will start again.
5.10.4 Deleting
A bold press will delete the selected file, but you will be asked to confirm the action.
5.10.5 Managing recordings from your computer
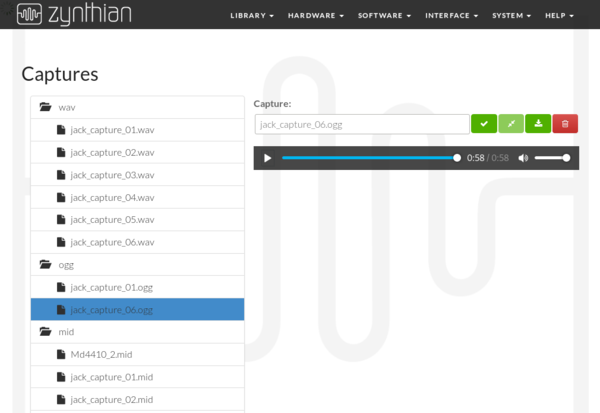
Audio & MIDI recordings can be managed from your computer by accessing the webconf's captures section. From this section you can:
- rename recordings
- delete recordings
- convert audio recordings to .ogg format for upload to websites.
- downloading recordings to your computer
- reproduce the audio recordings in your browser. If .wav files doesn't work in your browser, try converting to ogg.
It is a good idea to rename your recordings so they can be easily identified.
5.11 ALSA Mixer
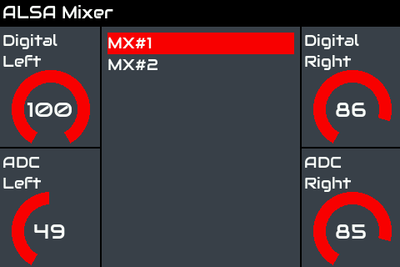
The ALSA Mixer app is a pseudo-layer that allows to adjust the soundcard output/input levels and other audio-hardware related options. Technically speaking, it's a user interface for the ALSA (Audio Linux Sound Architecture) mixer.
For accessing the ALSA-Mixer app, you have 2 options:
- Selecting "ALSA-Mixer" option from the Main menu
- Long-pushing the layer knob (CTRL-1)
You can configure the mixer controllers from the webconf's hardware->audio menu. Simply click the + button on the "Mixer Controls" text area.
5.12 Step Sequencer
Zynthian has a step sequencer which provides methods to create patterns and arrange them into sequences.
There are three main views:
ZynPad: Grid of pads to launch sequences
Arranger: Track / timeline editor for complex manipulation of sequences
Pattern Editor: Manipulation of individual events within patterns
The step sequencer may be accessed from the main Zynthian screen or by a long press of the LAYER encoder. There may be up to 999 patterns each with as many simultaneous notes (polphonic) as required over a set of steps and beats that are configurable for each pattern. Patterns are arranged into tracks within sequences. Sequences may be configured to loop or play once and may be grouped so that starting one sequence stops another. Sequences may start and stop at the start of each bar. Note entry can be performed from the Zynthian user interface or using an external MIDI controller. Sequences can be started and stopped from the Zynthian user interface or using an external MIDI controller.
Using ZynSeq is a detailed tutorial on the use of the step sequencer.
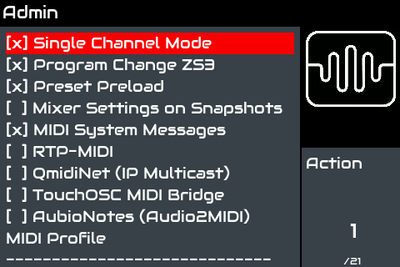
5.13 Admin Menu
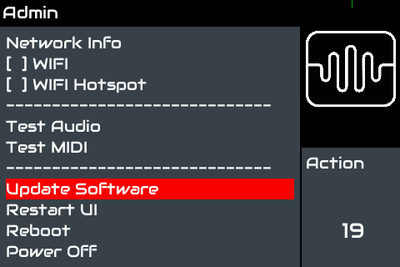
The Admin menu gives access to some configuration options (most of them also accessible from the webconf tool). Also includes basic testing options for audio and MIDI.
You can access this menu from the Main menu.
5.13.1 Touchscreen Calibration
Zynthian supports touchscreen operation for most operations. To ensure good alignment of the touch interface there is a calibration screen that is accessed from the Admin menu.
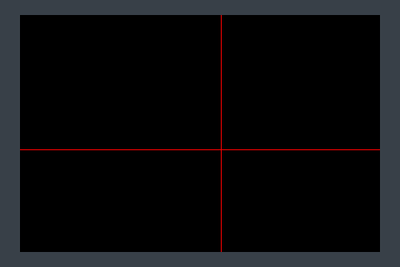
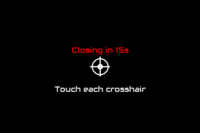
When the screen opens it shows a target crosshair in the center of the screen and a countdown timer. If the timer expires the screen will close without applying any calibration. Touch the target to detect the screen and begin calibration.
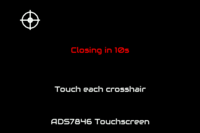
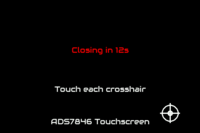
The name of the detected display is shown at the bottom of the screen. Further targets will appear. Touch the screen, drag to centre of target and release.
When the screen is pressed the target will show red. When released the measurement is taken and the next crosshair target appears white.
After releasing the last target, calibration is applied and the screen closes. Touch is ignored if too close to previous touch.
Use BACK button or wait for timeout to cancel calibration. Timer is reset to 15s when screen is touched and paused until released. The purpose of the timeout is to avoid users of Zynthians without back button being stuck in calibration screen view.
6 Touch Screen UI
You can navigate and control the Zynthian UI without knobs/encoders/switches at all, using only the touchscreen (or mouse).
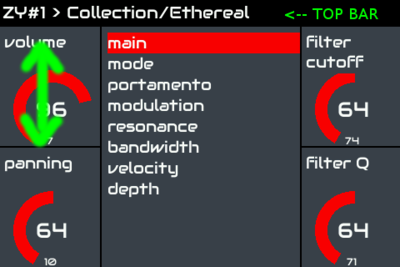
You can "emulate" the switches by tapping the controller widgets (squares in the 4 corners of the screen). There are short, bold and long actions, same behaviour than rotary encoders work-flow. The only screen having the 4 controller widgets is the "Instrument Control" screen. Most of screens are selectors, which only have 1 controller widget. On those screens you can click the zynthian logo (top-right) to emulate the "snapshot" switch, and you can go back by tapping the top-bar area.
You can change the controller values by "sliding" up/down over the widgets. (see the green arrow in the figure) This is the same as turning the knob. If you are using a mouse, the mouse wheel also can be used to change the controller value.
6.1 MIDI-CC Learning with a touch interface
Learning:
1. In the "Instrument Control" screen, navigate through the parameter screen list to get to the parameter you want to learn.
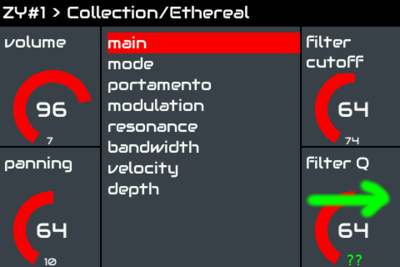
2. In the parameter/controller area, slide with your fingernail from left to right. A green "??" should appear at the bottom.
3. On your MIDI controller, move the desired knob/slider (or a CC-assigned pad).  The green "??" should be replaced by a tiny number, and the parameter should change when you move the knob/slider or push the pad. CC-assigned pads can be very useful for on/off parameters.
Unlearning:
1. In the "Instrument Control" screen, navigate through the parameter screen list until you get to the parameter you want to unlearn.
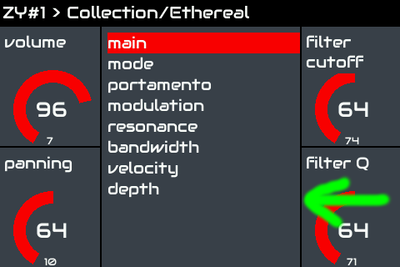
2. In the parameter/controller area, slide with your fingernail from right to left. The tiny number, indicating the current CC assignment, should disappear or change. If the parameter is an engine-specific controlled engine, the number will disappear. If the parameter is a hardcoded MIDI-mapped parameter, the number will change.
7 CUIA: Callable UI Actions
The Zynthian UI can be controlled remotely using a set of commands called CUIA: Callable UI Actions. These CUIA are available on several interfaces: Key Bindings, MIDI, OSC, etc.
7.1 Key Bindings: Controlling the UI with a computer keyboard
The user interface may be driven using a USB keyboard, e.g. QWERTY, Dvorak, etc.
| Key | Modifier | Function |
|---|---|---|
| Enter | None | SELECT |
| Enter | Shift | Bold SELECT |
| Enter | Ctrl | Long SELECT |
| Backspace | None | BACK |
| Backspace | Shift | Bold BACK |
| Backspace | Ctrl | Long BACK |
| Escape | None | BACK |
| Escape | Shift | Bold BACK |
| Escape | Ctrl | Long BACK |
| L | None | LAYER |
| L | Shift | Bold LAYER |
| L | Ctrl | Long LAYER |
| S | None | SNAPSHOT |
| S | Shift | Bold SNAPSHOT |
| S | Ctrl | Long SNAPSHOT |
| A | None | Start audio Record |
| A | Shift | Stop audio Record |
| A | Alt | Toggle audio Record |
| A | Ctrl | Start audio Play |
| A | Ctrl+Shift | Stop audio Play |
| M | None | Start MIDI Record |
| M | Shift | Stop MIDI Record |
| M | Ctrl | Start MIDI Play |
| M | Ctrl+Shift | Stop MIDI Play |
| Space | None | All Notes Off |
| Space | Shift | All Sounds Off |
| Space | Ctrl | All off |
| Home | Shift | Restart UI |
| Insert | Ctrl | Reload MIDI Config |
| Home | Ctrl | Reboot |
| End | Ctrl | Power Off |
| Up | None | Listbox Up |
| Down | None | Listbox Down |
| Left | None | BACK |
| Right | None | SELECT |
7.2 Controlling the UI with MIDI messages
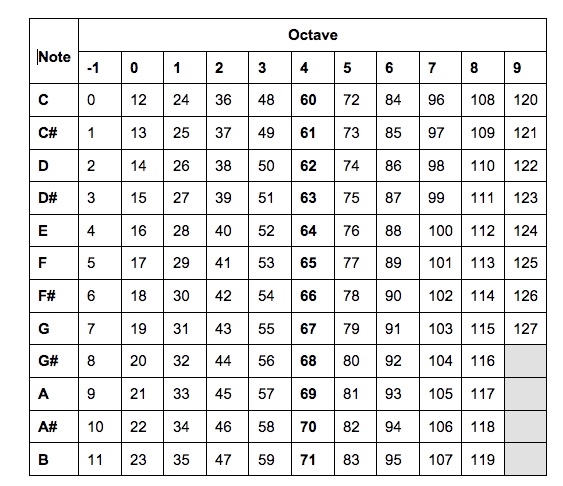
These actions are available using MIDI messages on the Master Channel (default 16, but configurable with the webconf tool), specifically, note-on messages (0x9) are used so you can use a MIDI keyboard for controlling the Zynthian UI. For instance, to Power Off the zynthian, you send this message:
0x9F  (Channel 16 Note ON)
0x00  (Note code for POWER_OFF as below)
0x00  (Velocity/parameter)
or play the C-1 key, if your keyboard has it.
This is the full list:
Num   CUIA                       Note         System Real-Time
0     POWER_OFF                  C-1
1     REBOOT                     C#-1
2     RESTART_UI                 D-1
3     RELOAD_MIDI_CONFIG         D#-1
4     RELOAD_KEY_BINDING         E-1
5     LAST_STATE_ACTION          F-1
10    ALL_NOTES_OFF              A#-1
11    ALL_SOUNDS_OFF             B-1
12    ALL_OFF                    C0
23    TOGGLE_AUDIO_RECORD        B0
24    START_AUDIO_RECORD         C1
25    STOP_AUDIO_RECORD          C#1
26    TOGGLE_AUDIO_PLAY          D1
27    START_AUDIO_PLAY           D#1
28    STOP_AUDIO_PLAY            E1
35    TOGGLE_MIDI_RECORD         B1
36    START_MIDI_RECORD          C2
37    STOP_MIDI_RECORD           C#2
38    TOGGLE_MIDI_PLAY           D2
39    START_MIDI_PLAY            D#2           Start/Continue: 0xFA, 0xFB
40    STOP_MIDI_PLAY             E2            Stop: 0xFC
51    SELECT                     D#3
52    SELECT_UP                  E3
53    SELECT_DOWN                F3
54    BACK_UP                    F#3
55    BACK_DOWN                  G3
56    LAYER_UP                   G#3
57    LAYER_DOWN                 A3
58    SNAPSHOT_UP                A#3
59    SNAPSHOT_DOWN              B3
64    SWITCH_BACK_SHORT          E4
63    SWITCH_BACK_BOLD           D#4
62    SWITCH_BACK_LONG           D4
65    SWITCH_SELECT_SHORT        F4
66    SWITCH_SELECT_BOLD         F#4
67    SWITCH_SELECT_LONG         G4
60    SWITCH_LAYER_SHORT         C4
61    SWITCH_LAYER_BOLD          C#4
59    SWITCH_LAYER_LONG          B3
71    SWITCH_SNAPSHOT_SHORT      B4
72    SWITCH_SNAPSHOT_BOLD       C5
73    SWITCH_SNAPSHOT_LONG       C#5
80    SCREEN_ADMIN               G#5
81    SCREEN_LAYER               A5
82    SCREEN_BANK                A#5
83    SCREEN_PRESET              B5
84    SCREEN_CONTROL             C6
90    MODAL_SNAPSHOT_LOAD        F#6
91    MODAL_SNAPSHOT_SAVE        G6
92    MODAL_AUDIO_RECORDER       G#6
93    MODAL_MIDI_RECORDER        A6
94    MODAL_ALSA_MIXER           A#6
95    MODAL_STEPSEQ              B6
7.3 Controlling the UI with OSC messages
The same CUIA calls are available using OSC on UDP 1370, with the base prefix "/cuia". Take a look to "Calling CUIA with OSC".
