Difference between revisions of "ZynSeq User Guide"
| (23 intermediate revisions by the same user not shown) | |||
| Line 16: | Line 16: | ||
So a pad can trigger a sequence which is a collection of patterns. A pattern is a collection of MIDI events. Let's create... | So a pad can trigger a sequence which is a collection of patterns. A pattern is a collection of MIDI events. Let's create... | ||
| + | |||
| + | = Menus and Parameters = | ||
| + | |||
| + | First we need to understand some user interface elements. Zynseq includes a context menu that is shown by short press LAYER or touching the top left of the screen. The LAYER or SELECT encoder may be used to highlight entries within this menu and short press LAYER or SELECT will select that entry. Alternatively the touchscreen may be used to select an entry by touching the selection. If the menu extends beyond the bottom of the screen it may be scrolled by highlighting lower entries with the SELECT or LAYER encoder or press and drag with the touchscreen. (Note: When touch and dragging on touchscreen the menu option will be selected when touch is released.) The first entries in context menu are common to all ZynSeq views. Entries below the first --- are context sensitive, i.e. specific to the current view or action being performed. | ||
| + | |||
| + | If a parameter is selected from the context menu its title and value is displayed in the title bar at the top of the screen. This is called the ''parameter editor''. The value may be adjusted with the LAYER or SELECT encoder and asserted by a short press of LAYER or SELECT. Short press BACK to cancel out of the parameter editor. If touchscreen widgets is enabled then buttons appear in the title bar allowing adjustment of the parameter. | ||
= Pattern Editor = | = Pattern Editor = | ||
| Line 21: | Line 27: | ||
[[File:zynseq_patterneditor.png|right|300px]] | [[File:zynseq_patterneditor.png|right|300px]] | ||
| − | By default each pad triggers a sequence containing a single pattern. Bold press | + | By default each pad triggers a sequence containing a single pattern. Bold press SELECT encoder or press and hold the touchscreen to show the Pattern Editor for the highlighted pad. There is a grid on the right called the ''Step Grid''. On the left is a representation of a piano keyboard. Each row represents a note and each column in the step grid represents a step in the sequence. |
Step sequences are a quantised collection of events, i.e. each event occurs at a discrete time and the available discrete times are equally and evenly distributed across the pattern. This means the difference in time between step 1 and step 2 occuring is the same as the difference in time between step 2 and step 3 occuring. | Step sequences are a quantised collection of events, i.e. each event occurs at a discrete time and the available discrete times are equally and evenly distributed across the pattern. This means the difference in time between step 1 and step 2 occuring is the same as the difference in time between step 2 and step 3 occuring. | ||
| − | One of the cells in the step grid has a coloured outline. This is the ''cursor'' and identifies which cell is currently highlighted. Use the BACK encoder to move the cursor up and down (between notes) and the | + | One of the cells in the step grid has a coloured outline. This is the ''cursor'' and identifies which cell is currently highlighted. Use the BACK encoder to move the cursor up and down (between notes) and the SELECT encoder to move the cursor left and right (between steps). To add a note, move the cusor to the desired step and note then short press the SELECT encoder. A note may be removed in the same way. Alternatively press the touchscreen on the cell you want to add or remove a note. Press and drag to allow more accurate positioning. As a note is added it is also sounded (MIDI sent to engine). All steps in a pattern are always shown. Notes above or below the visible area may be accessed by moving the cursor beyond the view with the BACK encoder. The view scrolls as the cursor reaches the edge. Alternatively use the touchscreen to press on the keyboard and drag up and down to vertically scroll the view. Note that as you touch a key on the keyboard it plays that note briefly. This is a useful tool for auditioning notes or phrases before adding them to the step grid. |
| − | To preview a pattern, short press the SNAPSHOT button to start the transport. A coloured bar at the bottom of the view will move left to right to indicate the position of the playhead and any notes entered in the pattern will be sent to the Zynthian's engines. To pause playback, short press SNAPSHOT. To stop and recue to the start of the pattern, bold press SNAPSHOT. If you press the touchscreen at the top right corner the transport controls display. Pressing the right pointing arrow play button will start playback. The play button changes colour to indicate it is playing. Pressing again will pause playback. Pressing the square stop button will stop playback and recue to start of pattern. Pressing top right of screen will hide the transport. Playback speed (Tempo) can be adjusted with the SNAPSHOT encoder or by selecting "Tempo" from the | + | To preview a pattern, short press the SNAPSHOT button to start the transport. A coloured bar at the bottom of the view will move left to right to indicate the position of the playhead and any notes entered in the pattern will be sent to the Zynthian's engines. To pause playback, short press SNAPSHOT. To stop and recue to the start of the pattern, bold press SNAPSHOT. If you press the touchscreen at the top right corner the transport controls display. Pressing the right pointing arrow play button will start playback. The play button changes colour to indicate it is playing. Pressing again will pause playback. Pressing the square stop button will stop playback and recue to start of pattern. Pressing top right of screen will hide the transport. Playback speed (Tempo) can be adjusted with the SNAPSHOT encoder or by selecting "Tempo" from the context menu. |
<br clear=all> | <br clear=all> | ||
[[File:zynseq_patterneditor_playing.png|right|300px]] | [[File:zynseq_patterneditor_playing.png|right|300px]] | ||
| − | Add some notes to form a melody and preview with the play function. Short press BACK will return to ZynPad | + | Add some notes to form a melody and preview with the play function. Short press BACK will return to ZynPad. |
<br clear=all> | <br clear=all> | ||
| Line 39: | Line 45: | ||
[[File:zynseq_patterneditor_notelength.png|right|300px]] | [[File:zynseq_patterneditor_notelength.png|right|300px]] | ||
| − | So far we have only added note with a duration of one step. | + | So far we have only added note with a duration of one step. Within Pattern Editor bold press SELECT to enable adjustment of ''note parameters''. The duration of a note may now be changed with the SELECT encoder. This adjusts the quantity of steps that new notes will span. It also adjusts the duration of the currently selected note in the pattern. Alternatively with a touchscreen press on an existing note and drag horizontally to adjust the duration. The cursor indicates the note duration. Short press BACK to reeturn to normal note input mode. |
<br clear=all> | <br clear=all> | ||
| Line 46: | Line 52: | ||
[[File:zynseq_patterneditor_notevelocity.png|right|300px]] | [[File:zynseq_patterneditor_notevelocity.png|right|300px]] | ||
| − | By default notes are added with a velocity (loudness) value of 100. (The range is 1 - 127.) | + | By default notes are added with a velocity (loudness) value of 100. (The range is 1 - 127.) Within pPattern Editor bold press SELECT to enable adjustment of note parameters. The velocity of a note may now be changed with the BACK encoder. This adjusts the velocity that new notes will have. It also adjusts the velocity of the currently selected note in the pattern. Alternatively with a touchscreen, press on an existing note and drag vertically to adjust the velocity. |
| + | |||
| + | The velocity is indicated by a yellow bar in the bottom left of the screen. The velocity of individual notes is indicated by the opacity of the note in the note grid. The brighter the grid cell, the higher the velocity. Short press BACK to return to normal note input mode. | ||
<br clear=all> | <br clear=all> | ||
| + | |||
| + | = Adding Notes With MIDI Controller = | ||
| + | |||
| + | It is possible to use a MIDI controller to add notes to a pattern, e.g. MIDI keyboard connected to Zynthian. Select "Input channel" from Pattern Editor context menu to adjust the MIDI channel that ZynSeq listens for input. When the Pattern Editor is shown, any note sent on this channel will add a note to the pattern at the current playhead cursor position with the current note duration and if the pattern is not being played, move the playhead to the next step. To add longer notes (in multiples of the current note duration) press the hold pedal whilst adding notes. It is possible to assign a note that acts as a rest, i.e. will not add a note to the sequence and skip to the next step. Select "Rest note" from pattern editor context menu to select which note will act as a rest. None may be selected by rotating SELECT encoder to the end of the range, i.e. below C-1 or above G9. | ||
= Playing a sequence = | = Playing a sequence = | ||
| − | The pad is purple which indicates that the sequence is not playing. Similar to how we navigate the cursor in the | + | The pad is purple which indicates that the sequence is not playing. Similar to how we navigate the cursor in the Pattern Editor we can move the cursor in ZynPad with the BACK and SELECT encoders. Move the cursor to the top left to highlight pad A1 (it is probably already there) then short press SELECT encoder to start playback of sequence A1. This can also be achieved with a touchscreen by simply pressing pad A1. Playback of the pattern you created should start to loop. |
| + | |||
| + | Tempo may be adjusted using the SNAPSHOT encoder or by selecting "Tempo" from the context menu (if touchscreen widgets enabled). | ||
[[File:zynseq_zynpad_4x4playing.png|right|300px]] | [[File:zynseq_zynpad_4x4playing.png|right|300px]] | ||
| − | The pad changes to green indicating it is playing | + | The pad changes to green indicating it is playing. Short press SELECT or tap the pad with the touchscreen to stop the sequence playing. |
<br clear=all> | <br clear=all> | ||
[[File:zynseq_zynpad_4x4stopping.png|right|300px]] | [[File:zynseq_zynpad_4x4stopping.png|right|300px]] | ||
| − | The pad changes to red to indicate it is stopping and then to purple to indicate it has stopped | + | The pad changes to red to indicate it is stopping and then to purple to indicate it has stopped. |
<br clear=all> | <br clear=all> | ||
= Multiple Sequences = | = Multiple Sequences = | ||
| − | [[File: | + | [[File:zynpad_starting.png|right|300px]] |
| − | So far we have edited a single pattern in one pad's sequence. Let's | + | So far we have edited a single pattern in one pad's sequence. Let's add patterns to other pads. By default ZynSeq has 4 pads. User BACK and SELECT encoders to select each pad and bold press SELECT to show its Pattern Editor. Add a new melody to the each pattern then short press BACK or touch top left and select the back icon from the topbar to return to ZynPad. |
| − | |||
| − | |||
| − | |||
| − | |||
| − | + | Start pad A1: see its button turn green and hear its sequence loop. | |
Start pad A2. Pad A2 changes to orange but does not start to play yet. Orange indicates sequence is waiting to start. A1 pad changes to red and continues to play. Red indicates sequence is playing but will soon stop. A2 pad will change to green and start playing as A1 stops and changes to purple. The behaviour occurs because these pads are in the same group, "A" (see below). | Start pad A2. Pad A2 changes to orange but does not start to play yet. Orange indicates sequence is waiting to start. A1 pad changes to red and continues to play. Red indicates sequence is playing but will soon stop. A2 pad will change to green and start playing as A1 stops and changes to purple. The behaviour occurs because these pads are in the same group, "A" (see below). | ||
| Line 80: | Line 90: | ||
= Groups = | = Groups = | ||
| − | Each pad belongs to a mutually exclusive group. This means that only one pad within | + | Each pad belongs to a mutually exclusive group. This means that only one pad within the same group may play. Pads from other groups may play simultaneously. The group is indicated by the single letter prefix of the pad name. There are up to 26 groups, A-Z. |
<br clear=all> | <br clear=all> | ||
| Line 105: | Line 115: | ||
Remember, pads are indexed by number, 1, 2, 3, etc. and Groups by letter, A, B, C, etc. Pad labels consist of the group letter and sequence number, e.g. A1. | Remember, pads are indexed by number, 1, 2, 3, etc. and Groups by letter, A, B, C, etc. Pad labels consist of the group letter and sequence number, e.g. A1. | ||
| − | = | + | = Grid Size = |
| − | |||
| − | |||
| − | + | [[File:zynpad_grid_size.png|right|300px]] | |
| − | + | By default ZynPad shows a 2x2 grid of 4 pads. The grid is always square, i.e. has the same quantity of columns as rows. The quanityt of pads may be adjusted by selecting "Grid size" from the ZynPad context menu. The maximum quantity of pads is 64 (8x8). | |
<br clear=all> | <br clear=all> | ||
| − | Sequences are removed immediately when the | + | Sequences are removed immediately when the girs size is reduced. The patterns are not lost and may be recovered when the grid size is increased. Beware that this may result in apparently ''new'' pads containing previously created patterns. |
= Sequence Modes = | = Sequence Modes = | ||
| − | So far we have used the default mode for sequences which will loop the sequence until requested to stop at which point it will continue to play until the next sync point. There are many modes available which each offer features for different workflows / requirements. To change mode, select " | + | [[File:zynpad_pad_mode.png|right|300px]] |
| + | |||
| + | So far we have used the default mode for sequences which will loop the sequence until requested to stop at which point it will continue to play until the next sync point. There are many modes available which each offer features for different workflows / requirements. To change mode, select "Pad mode" from the ZynPad's context menu. This will allow change of mode of the highlighted sequence. The mode is indicated by an icon. | ||
Available modes are: | Available modes are: | ||
| Line 136: | Line 146: | ||
= Tempo = | = Tempo = | ||
| − | Tempo is the rate at which the sequencer plays back notes measured in beats per minutes (BPM). By default zynseq plays sequences at | + | Tempo is the rate at which the sequencer plays back notes measured in beats per minutes (BPM). By default zynseq plays sequences at 120 BPM. Adjust Tempo with the SNAPSHOT encoder. The tempo is breifly displayed in the title bar. There is also a context menu option to adjust tempo which may be used on touchscreens. The current tempo is saved and loaded with each song. |
| − | |||
| − | |||
| − | |||
| − | |||
| − | |||
| − | |||
| − | |||
= MIDI channels = | = MIDI channels = | ||
| − | Each sequence | + | Each pad will play a sequence to a single MIDI channel. Several sequences may be assigned to the same MIDI channel. By default each sequence is assigned MIDI channel 1. Use the ZynPad's "MIDI channel" context menu option to set the MIDI channel of the currently highlighted pad. |
= Songs = | = Songs = | ||
| − | All the configuration described above relates to a song. Zynthian supports 999 songs, each may have different quantity of sequences, etc. Songs are identified by an index 1-999. This can be selected from any ZynSeq context menu or directly by using LAYER encoder in ZynPad or | + | All the configuration described above relates to a song. Zynthian supports 999 songs, each may have different quantity of sequences, etc. Songs are identified by an index 1-999. This can be selected from any ZynSeq context menu or directly by using LAYER encoder in ZynPad or Arranger views. The current song is shown in the topbar. Songs 1-128 may also be selected with MIDI Song Select message. |
| − | All songs share the same pool of patterns allowing reuse of patterns in different songs. With | + | All songs share the same pool of patterns allowing reuse of patterns in different songs but by default each pad in each song has a different sequence with different pattern. With 2000 patterns available there should be sufficient to create all the sequences in all the songs you need. If not, see section on Save and Load. |
| − | Songs may be copied by selecting "Copy song" from | + | Songs may be copied by selecting "Copy song" from Arranger context menu. |
| − | A song may be cleared, removing all sequences by selecting "Clear song" from context menu then asserting by short press | + | A song may be cleared, removing all sequences by selecting "Clear song" from context menu then asserting by short press SELECT. |
| − | If any sequences are playing when changing song, they continue to play until a sequence in the new song is started. The tempo remains unchanged, i.e. the new song's tempo is ignored (only if playing when the song is selected). | + | If any sequences are playing when changing song, they continue to play until a sequence in the new song is started. The tempo remains unchanged, i.e. the new song's tempo is ignored (only if playing when the song is selected). This allows seemless transition between songs. |
= Save / Load = | = Save / Load = | ||
| − | If you run out of patterns or songs or want to have different configurations for different scenarios you have the option save the whole ZynSeq sequence set. From any context menu select "Save" to show an on-screen keyboard allowing naming of the sequence set. By default the name of the currenly loaded sequence set is shown. Use the | + | If you run out of patterns or songs or want to have different configurations for different scenarios you have the option save the whole ZynSeq sequence set. From any context menu select "Save" to show an on-screen keyboard allowing naming of the sequence set. By default the name of the currenly loaded sequence set is shown. Use the SELECT encoder to highlight a character. This moves the cursor left and right, wrapping to next row at end of row and back to start when reaching the end. The BACK encoder may be used to move cursor between rows (but does not wrap). Short press SELECT to add the character to the name. There is a DELETE button to remove the last character and a SHIFT button to show alternative characters. You may also use the keyboard with direct press of the touchscreen. On-screen CANCEL button or short press BACK will cancel the operation. Selecting on-screen SELECT button will save the sequence set with the name displayed at top of screen. |
| − | A previously saved sequence set may be loaded by selecting "Load" from any context menu. A list of sequence sets is displayed. Highlight the required name using the | + | A previously saved sequence set may be loaded by selecting "Load" from any context menu. A list of sequence sets is displayed. Highlight the required name using the SELECT encoder then short press SELECT to load the highligted sequence set. Alternatively press the touchscreen to select the set to load. A sequence set may be deleted by bold press SELECT. A confirmation message is displayed. |
Sequence sets are also saved with snapshots. | Sequence sets are also saved with snapshots. | ||
| Line 171: | Line 174: | ||
= External Trigger = | = External Trigger = | ||
| − | It is possible to trigger a sequence from a MIDI controller, e.g. a MIDI keyboard connected to the Zynthian. Zynseq listens for triggers on a | + | It is possible to trigger a sequence from a MIDI controller, e.g. a MIDI keyboard connected to the Zynthian. Zynseq listens for triggers on a the ''Master MIDI channel''. |
| − | Each sequence may be triggered by a MIDI note. Select "Trigger" from | + | Each sequence may be triggered by a MIDI note. Select "Trigger note" from ZynPad's context menu to adjust the MIDI note that will trigger the highlighted pad. By default triggers are disabled. To disable a sequence from being triggered set its trigger value to None which is below C-1 or above G9, i.e. increase to maximum value. The trigger note is shown in brackets after the sequence name on the left of the Arranger, e.g. A1 (2, C4) indicates sequence 1 is triggered by note C4. |
| − | + | ZynSeq will send MIDI note on / off messages to represent the current play status of each sequence. This may be used by an external pad controller like Novation's Launchpad to indicate the status of a sequence. The note number sent is the same as the external trigger configured for a sequence. Tallies are sent on the ''Master MIDI channel''. | |
| − | + | = Arranger = | |
| − | + | [[File:arranger.png|right|300px]] | |
| − | + | Each pad triggers a sequence which may contain one or more patterns. By default each sequence contains a single pattern but it is possible to create more complex arrangements by adding more patterns to the sequence. The Arranger is a view that allows the manipulation of sequences used by pads. The Arranger is accessed from the context menu. | |
| − | Each | + | The view should change to show a different type of grid. Each horizontal row represents a sequence assigned to a pad. On the left the pad's name and some other info is shown on a coloured cell. To the right is where patterns are added and removed. This is called the ''Patterns Grid''. Each sequence may have as many or few patterns as desired. It may be common to use just one pattern for each sequence but more complex combinations are possible. |
| − | |||
| − | + | When the Arranger is first opened the first pattern (or time slot) of the sequence for the previously highlighted pad will be highlighted. | |
| − | + | Navigation around the patterns grid is performed by rotating the BACK encoder to move up and down (select different pads) and the SELECT encoder to move left and right (select time). The currently highlighted cell is shown by a coloured outline called the cursor. | |
| − | + | Short press the SELECT encoder or short tap on touchscreen will add or remove a pattern at the position of the cursor. This may take a little practice to place it where you want but you can press, drag and release to position it more accurately. | |
| − | + | The pattern to be added is indicated by a number in the bottom left of the screen. This can be adjusted with the LAYER encoder or by clicking on the number / selecting "Pattern" from the context menu to show the parameter editor. | |
| − | |||
| − | + | Each pattern is represented as a black block with its pattern number in white text. Bold press SELECT or press and hold touchscreen to open the Pattern Editor for the selected pattern. BACK will return to the Arranger. | |
| − | |||
<br clear=all> | <br clear=all> | ||
| − | |||
| − | |||
| − | |||
| − | |||
Note that triggering a pad in ZynPad starts a sequence which consists of patterns which in turn consists of the notes of your melody. This hierarchical relationship may be slightly more complex than a typical step sequencer offers many benefits. Just remember that a pad triggers a sequence. A sequence contains patterns. A pattern contains MIDI events, e.g. notes. | Note that triggering a pad in ZynPad starts a sequence which consists of patterns which in turn consists of the notes of your melody. This hierarchical relationship may be slightly more complex than a typical step sequencer offers many benefits. Just remember that a pad triggers a sequence. A sequence contains patterns. A pattern contains MIDI events, e.g. notes. | ||
| − | |||
| − | = Complex Sequences = | + | == Complex Sequences == |
| − | A sequence may have any quantity of patterns either sequentially or separated by time. Patterns may not overlap within a sequence, i.e. a pattern's start must be at or later than the preceeding pattern's end. To add patterns to a sequence, within | + | A sequence may have any quantity of patterns either sequentially or separated by time. Patterns may not overlap within a sequence, i.e. a pattern's start must be at or later than the preceeding pattern's end. To add patterns to a sequence, within Arranger: |
* Select the required pattern | * Select the required pattern | ||
* Move the cursor to the sequence and time at which to add the pattern | * Move the cursor to the sequence and time at which to add the pattern | ||
| − | * Short press | + | * Short press SELECT |
The cursor will show the duration of the pattern to be added. The cursor moves to the next time division unless the pattern will not fit within the gap in which case the cursor will jump to the start of the next pattern (even if the new pattern is longer than the next highligted pattern, to allow removal of patterns). | The cursor will show the duration of the pattern to be added. The cursor moves to the next time division unless the pattern will not fit within the gap in which case the cursor will jump to the start of the next pattern (even if the new pattern is longer than the next highligted pattern, to allow removal of patterns). | ||
| Line 219: | Line 214: | ||
Encoders have been assigned to optimise this workflow: | Encoders have been assigned to optimise this workflow: | ||
Move cursor to sequence with BACK encoder | Move cursor to sequence with BACK encoder | ||
| − | Move cursor to time with | + | Move cursor to time with SELECT encoder |
| − | Add / remove patterns with short press | + | Add / remove patterns with short press SELECT |
Select pattern with LAYER encoder | Select pattern with LAYER encoder | ||
| − | = | + | <br clear=all> |
| + | |||
| + | = Zooming = | ||
| + | |||
| + | [[File:arranger_zoom.png|right|300px]] | ||
| + | |||
| + | Within Arranger the quantity of visible sequences (rows) may be adjusted by selecting "Vertical zoom" from the context menu. The size of patterns may be adjusted by selecting "Horizontal zoom" from the context menu. This adjusts the quantity of timeslots shown so increasing horizontal zoom actauall zooms out. | ||
| − | + | Similarly, the quantity of keyboard notes in the Pattern Editor may be adjusted by selecting "Vertical zoom" from the context menu. There is no horizontal zoom for the Pattern Editor because it always shows all steps in a pattern. | |
| + | <br clear=all> | ||
= Time Signature = | = Time Signature = | ||
| Line 233: | Line 235: | ||
A pattern has three parameters that affect playback speed: Beats in pattern, Steps per beat & Beat type. These can each be changed from the Pattern Editor context menu. | A pattern has three parameters that affect playback speed: Beats in pattern, Steps per beat & Beat type. These can each be changed from the Pattern Editor context menu. | ||
| − | Beat type defines the duration of each beat and corresponds to the denominator of a time signature. A value of 1 means the beat is a semibreve / whole note. 2 means minim / half note. 4 is a crotchet / quarter note, etc. This is not graphically obvious in the Pattern Editor because it does not change the steps in the pattern and all steps are shown. Beat type changes the duration and hence larger values result in smaller steps and faster playback of the pattern. This is obvious in the | + | Beat type defines the duration of each beat and corresponds to the denominator of a time signature. A value of 1 means the beat is a semibreve / whole note. 2 means minim / half note. 4 is a crotchet / quarter note, etc. This is not graphically obvious in the Pattern Editor because it does not change the steps in the pattern and all steps are shown. Beat type changes the duration and hence larger values result in smaller steps and faster playback of the pattern. This is obvious in the Arranger where the size of the pattern will change, growing for lower values of beat type. |
Beats in pattern defines the quantity of beats the pattern spans. Each beat is represented by a vertical white line on the note grid. As the beats in pattern change these lines move accordingly. The higher the value of beats in pattern, the longer the pattern. | Beats in pattern defines the quantity of beats the pattern spans. Each beat is represented by a vertical white line on the note grid. As the beats in pattern change these lines move accordingly. The higher the value of beats in pattern, the longer the pattern. | ||
| Line 263: | Line 265: | ||
= Import MIDI Files = | = Import MIDI Files = | ||
| − | There are some excellent percussion patterns available in MIDI File Format. Zynthian offers the ability to import such files into ZynSeq patterns. A MIDI file may be imported to one or more patterns. Some automation is involved in resolving pattern parameters, e.g. if the MIDI file contains events that would span more than one pattern, consecutive patterns are overwritten with the imported events. | + | There are some excellent percussion patterns available in MIDI File Format. Zynthian offers the ability to import such files into ZynSeq patterns. A MIDI file may be imported to one or more patterns. Some automation is involved in resolving pattern parameters, e.g. if the MIDI file contains events that would span more than one pattern, consecutive patterns are overwritten with the imported events. Only events from a single MIDI channel are imported. |
| − | * | + | * Use webconf to upload a MIDI File Format file to the ''Captures'' area |
| − | |||
* Select a pattern to import into | * Select a pattern to import into | ||
| − | * | + | * Use Pattern Editor's context menu to set the beats in pattern, steps per beat, beat type and Input channel (the MIDI channel to extract) |
* Select "Import" from the Pattern Editor context menu | * Select "Import" from the Pattern Editor context menu | ||
| − | * A list of MIDI files | + | * A list of MIDI files is shown |
| − | * Use | + | * Use SELECT encoder to highlight the desired file then short press SELECT to import or use touchscreen to select the desired file |
* MIDI note events are imported into the current and subsequent patterns, overwritting any existing patterns | * MIDI note events are imported into the current and subsequent patterns, overwritting any existing patterns | ||
* Events will be quantised to match the pattern configuration | * Events will be quantised to match the pattern configuration | ||
Revision as of 19:01, 10 January 2021
1 ZynSeq - The Zynthian Sequencer
This guide explains how to access and use the Zynthian's step sequencer called, ZynSeq. Before following the guide, add 2 synth engines to layers using MIDI channels 1 & 2 respectively. We will use these to demonstrate ZynSeq. If you use a touchscreen instead of rotary encoders then enable touch widgets using webconf INTERFACE->UI Options.
TODO: Provide a demo snapshot with engines and sequences configured.
2 Accessing ZynSeq
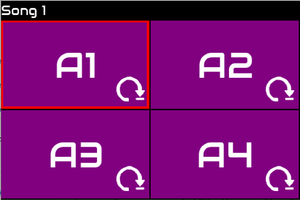
To access the sequencer, select "Step Sequencer" from the main menu or use the shortcut: long press SNAPSHOT encoder. The first time you access the sequencer you will see a 2x2 grid of purple rectangles. This view is called ZynPad and provides a live performance interface to ZynSeq. Each of rectangle represents a pad which may be used to play a sequence. Use of ZynPad is described later but first we need to add some sequences to play.
What is a sequence? A sequence is a collection of patterns which may be played and looped. Several sequences may be played simultaneously, each playing any of the 16 MIDI channels. We will see how sequences are manipulated in the section Arranger.
What is a pattern? A pattern is a collection of MIDI events, e.g. notes. Each pattern has a duration in steps and may include as many simultaneous (polyphonic) notes as desired on each step. We will see how patterns are manipulated in the section Pattern Editor.
So a pad can trigger a sequence which is a collection of patterns. A pattern is a collection of MIDI events. Let's create...
3 Menus and Parameters
First we need to understand some user interface elements. Zynseq includes a context menu that is shown by short press LAYER or touching the top left of the screen. The LAYER or SELECT encoder may be used to highlight entries within this menu and short press LAYER or SELECT will select that entry. Alternatively the touchscreen may be used to select an entry by touching the selection. If the menu extends beyond the bottom of the screen it may be scrolled by highlighting lower entries with the SELECT or LAYER encoder or press and drag with the touchscreen. (Note: When touch and dragging on touchscreen the menu option will be selected when touch is released.) The first entries in context menu are common to all ZynSeq views. Entries below the first --- are context sensitive, i.e. specific to the current view or action being performed.
If a parameter is selected from the context menu its title and value is displayed in the title bar at the top of the screen. This is called the parameter editor. The value may be adjusted with the LAYER or SELECT encoder and asserted by a short press of LAYER or SELECT. Short press BACK to cancel out of the parameter editor. If touchscreen widgets is enabled then buttons appear in the title bar allowing adjustment of the parameter.
4 Pattern Editor
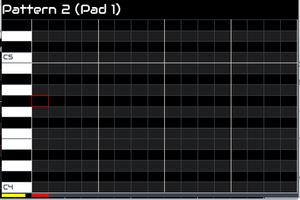
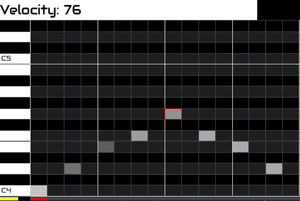
By default each pad triggers a sequence containing a single pattern. Bold press SELECT encoder or press and hold the touchscreen to show the Pattern Editor for the highlighted pad. There is a grid on the right called the Step Grid. On the left is a representation of a piano keyboard. Each row represents a note and each column in the step grid represents a step in the sequence.
Step sequences are a quantised collection of events, i.e. each event occurs at a discrete time and the available discrete times are equally and evenly distributed across the pattern. This means the difference in time between step 1 and step 2 occuring is the same as the difference in time between step 2 and step 3 occuring.
One of the cells in the step grid has a coloured outline. This is the cursor and identifies which cell is currently highlighted. Use the BACK encoder to move the cursor up and down (between notes) and the SELECT encoder to move the cursor left and right (between steps). To add a note, move the cusor to the desired step and note then short press the SELECT encoder. A note may be removed in the same way. Alternatively press the touchscreen on the cell you want to add or remove a note. Press and drag to allow more accurate positioning. As a note is added it is also sounded (MIDI sent to engine). All steps in a pattern are always shown. Notes above or below the visible area may be accessed by moving the cursor beyond the view with the BACK encoder. The view scrolls as the cursor reaches the edge. Alternatively use the touchscreen to press on the keyboard and drag up and down to vertically scroll the view. Note that as you touch a key on the keyboard it plays that note briefly. This is a useful tool for auditioning notes or phrases before adding them to the step grid.
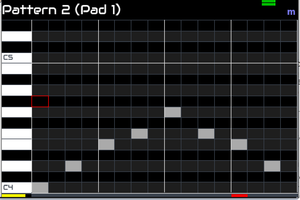
To preview a pattern, short press the SNAPSHOT button to start the transport. A coloured bar at the bottom of the view will move left to right to indicate the position of the playhead and any notes entered in the pattern will be sent to the Zynthian's engines. To pause playback, short press SNAPSHOT. To stop and recue to the start of the pattern, bold press SNAPSHOT. If you press the touchscreen at the top right corner the transport controls display. Pressing the right pointing arrow play button will start playback. The play button changes colour to indicate it is playing. Pressing again will pause playback. Pressing the square stop button will stop playback and recue to start of pattern. Pressing top right of screen will hide the transport. Playback speed (Tempo) can be adjusted with the SNAPSHOT encoder or by selecting "Tempo" from the context menu.
Add some notes to form a melody and preview with the play function. Short press BACK will return to ZynPad.
5 Note Duration
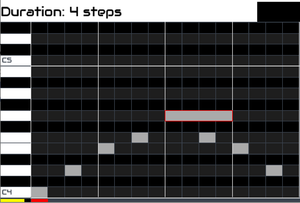
So far we have only added note with a duration of one step. Within Pattern Editor bold press SELECT to enable adjustment of note parameters. The duration of a note may now be changed with the SELECT encoder. This adjusts the quantity of steps that new notes will span. It also adjusts the duration of the currently selected note in the pattern. Alternatively with a touchscreen press on an existing note and drag horizontally to adjust the duration. The cursor indicates the note duration. Short press BACK to reeturn to normal note input mode.
6 Note Velocity
By default notes are added with a velocity (loudness) value of 100. (The range is 1 - 127.) Within pPattern Editor bold press SELECT to enable adjustment of note parameters. The velocity of a note may now be changed with the BACK encoder. This adjusts the velocity that new notes will have. It also adjusts the velocity of the currently selected note in the pattern. Alternatively with a touchscreen, press on an existing note and drag vertically to adjust the velocity.
The velocity is indicated by a yellow bar in the bottom left of the screen. The velocity of individual notes is indicated by the opacity of the note in the note grid. The brighter the grid cell, the higher the velocity. Short press BACK to return to normal note input mode.
7 Adding Notes With MIDI Controller
It is possible to use a MIDI controller to add notes to a pattern, e.g. MIDI keyboard connected to Zynthian. Select "Input channel" from Pattern Editor context menu to adjust the MIDI channel that ZynSeq listens for input. When the Pattern Editor is shown, any note sent on this channel will add a note to the pattern at the current playhead cursor position with the current note duration and if the pattern is not being played, move the playhead to the next step. To add longer notes (in multiples of the current note duration) press the hold pedal whilst adding notes. It is possible to assign a note that acts as a rest, i.e. will not add a note to the sequence and skip to the next step. Select "Rest note" from pattern editor context menu to select which note will act as a rest. None may be selected by rotating SELECT encoder to the end of the range, i.e. below C-1 or above G9.
8 Playing a sequence
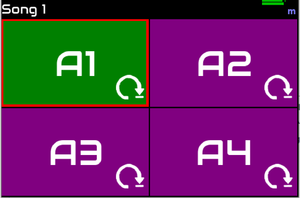
The pad is purple which indicates that the sequence is not playing. Similar to how we navigate the cursor in the Pattern Editor we can move the cursor in ZynPad with the BACK and SELECT encoders. Move the cursor to the top left to highlight pad A1 (it is probably already there) then short press SELECT encoder to start playback of sequence A1. This can also be achieved with a touchscreen by simply pressing pad A1. Playback of the pattern you created should start to loop.
Tempo may be adjusted using the SNAPSHOT encoder or by selecting "Tempo" from the context menu (if touchscreen widgets enabled).
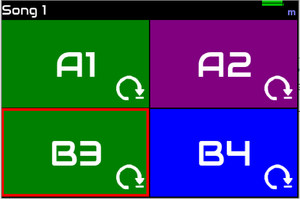
The pad changes to green indicating it is playing. Short press SELECT or tap the pad with the touchscreen to stop the sequence playing.
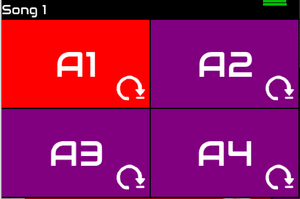
The pad changes to red to indicate it is stopping and then to purple to indicate it has stopped.
9 Multiple Sequences
So far we have edited a single pattern in one pad's sequence. Let's add patterns to other pads. By default ZynSeq has 4 pads. User BACK and SELECT encoders to select each pad and bold press SELECT to show its Pattern Editor. Add a new melody to the each pattern then short press BACK or touch top left and select the back icon from the topbar to return to ZynPad.
Start pad A1: see its button turn green and hear its sequence loop.
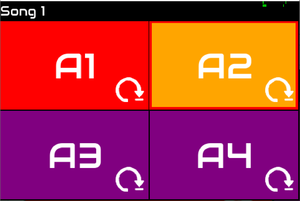
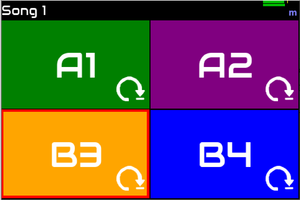
Start pad A2. Pad A2 changes to orange but does not start to play yet. Orange indicates sequence is waiting to start. A1 pad changes to red and continues to play. Red indicates sequence is playing but will soon stop. A2 pad will change to green and start playing as A1 stops and changes to purple. The behaviour occurs because these pads are in the same group, "A" (see below).
10 Groups
Each pad belongs to a mutually exclusive group. This means that only one pad within the same group may play. Pads from other groups may play simultaneously. The group is indicated by the single letter prefix of the pad name. There are up to 26 groups, A-Z.
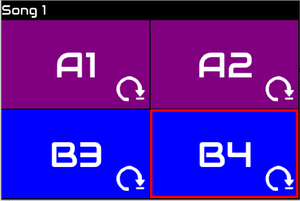
By default sequences are in group A. To change a pad's group, select "Group" from the ZynPad context menu. The group may be set to A-Z. Odd groups (A,C,E, etc.) are represented with purple background. Even groups (B,D,F, etc.) are represented with blue background. This allow a degree of separation in ZynPad without overloading with excessive quantity of colours.
Use the BACK and SELECT encoders to highlight a pad or touch it with the touchscreen. Use the context menu to change the group to 'B'. The pad name changes to B3 and its background colour changes to blue. Repeat to change A4 to B4.
Start pad A1. Pad A1 changes to green and its sequence starts playing.
Start pad B3. Pad B3 turns orange indicating it is waiting to start.
Sequence B3 will start when the currently playing sequence reaches a sync point so that playback is synchronised. Start pad B4. Sequence B3 will continue then sequence B4 starts as B3 stops. A1 should continue to play. This is a powerful performance feature of ZynPad. You can assign any quantity of pads to any group providing groups of mutually exclusive (only one can play at a time) sequences. Sequences from different groups can play simultaneously but sequences from the same group will play sequentially.
A Sync point is a location within playback at which sequences will loop and / or group sequential play will change to another sequence. Sync points are synonymous with bars in traditional music notation. See section on time signature.
Remember, pads are indexed by number, 1, 2, 3, etc. and Groups by letter, A, B, C, etc. Pad labels consist of the group letter and sequence number, e.g. A1.
11 Grid Size
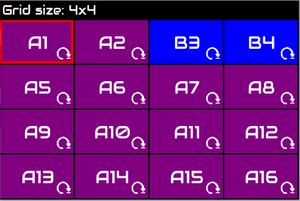
By default ZynPad shows a 2x2 grid of 4 pads. The grid is always square, i.e. has the same quantity of columns as rows. The quanityt of pads may be adjusted by selecting "Grid size" from the ZynPad context menu. The maximum quantity of pads is 64 (8x8).
Sequences are removed immediately when the girs size is reduced. The patterns are not lost and may be recovered when the grid size is increased. Beware that this may result in apparently new pads containing previously created patterns.
12 Sequence Modes
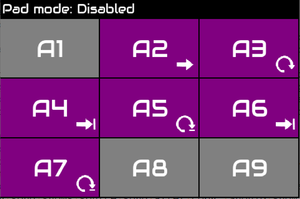
So far we have used the default mode for sequences which will loop the sequence until requested to stop at which point it will continue to play until the next sync point. There are many modes available which each offer features for different workflows / requirements. To change mode, select "Pad mode" from the ZynPad's context menu. This will allow change of mode of the highlighted sequence. The mode is indicated by an icon.
Available modes are:
- Disabled: Sequence is disabled and cannot be played
- Oneshot: Sequence will play once, i.e. not loop. When stopped sequence will stop immediately
- Loop: Sequence will loop at end of sequence. When stopped sequence will stop immediately
- Oneshot all: Sequence will play once, i.e. not loop. When stopped sequence will continue to play until end of sequence
- Loop all: Sequence will loop at end of sequence. When stopped sequence will continue to play until end of sequence
- Oneshot sync: Sequence will play once, i.e. not loop. When stopped sequence will continue to play until next sync point (end of bar)
- Loop sync: Sequence will loop at end of sequence. When stopped sequence will continue to play until next sync point (end of bar)
Loop sync is the default mode.
All these modes affect how sequences stop. There are currently no modes that affect how a sequence starts. The first sequence to be started will start immediately. If any sequences are playing then all sequences will start at the next sync point.
13 Tempo
Tempo is the rate at which the sequencer plays back notes measured in beats per minutes (BPM). By default zynseq plays sequences at 120 BPM. Adjust Tempo with the SNAPSHOT encoder. The tempo is breifly displayed in the title bar. There is also a context menu option to adjust tempo which may be used on touchscreens. The current tempo is saved and loaded with each song.
14 MIDI channels
Each pad will play a sequence to a single MIDI channel. Several sequences may be assigned to the same MIDI channel. By default each sequence is assigned MIDI channel 1. Use the ZynPad's "MIDI channel" context menu option to set the MIDI channel of the currently highlighted pad.
15 Songs
All the configuration described above relates to a song. Zynthian supports 999 songs, each may have different quantity of sequences, etc. Songs are identified by an index 1-999. This can be selected from any ZynSeq context menu or directly by using LAYER encoder in ZynPad or Arranger views. The current song is shown in the topbar. Songs 1-128 may also be selected with MIDI Song Select message.
All songs share the same pool of patterns allowing reuse of patterns in different songs but by default each pad in each song has a different sequence with different pattern. With 2000 patterns available there should be sufficient to create all the sequences in all the songs you need. If not, see section on Save and Load.
Songs may be copied by selecting "Copy song" from Arranger context menu.
A song may be cleared, removing all sequences by selecting "Clear song" from context menu then asserting by short press SELECT.
If any sequences are playing when changing song, they continue to play until a sequence in the new song is started. The tempo remains unchanged, i.e. the new song's tempo is ignored (only if playing when the song is selected). This allows seemless transition between songs.
16 Save / Load
If you run out of patterns or songs or want to have different configurations for different scenarios you have the option save the whole ZynSeq sequence set. From any context menu select "Save" to show an on-screen keyboard allowing naming of the sequence set. By default the name of the currenly loaded sequence set is shown. Use the SELECT encoder to highlight a character. This moves the cursor left and right, wrapping to next row at end of row and back to start when reaching the end. The BACK encoder may be used to move cursor between rows (but does not wrap). Short press SELECT to add the character to the name. There is a DELETE button to remove the last character and a SHIFT button to show alternative characters. You may also use the keyboard with direct press of the touchscreen. On-screen CANCEL button or short press BACK will cancel the operation. Selecting on-screen SELECT button will save the sequence set with the name displayed at top of screen.
A previously saved sequence set may be loaded by selecting "Load" from any context menu. A list of sequence sets is displayed. Highlight the required name using the SELECT encoder then short press SELECT to load the highligted sequence set. Alternatively press the touchscreen to select the set to load. A sequence set may be deleted by bold press SELECT. A confirmation message is displayed.
Sequence sets are also saved with snapshots.
17 External Trigger
It is possible to trigger a sequence from a MIDI controller, e.g. a MIDI keyboard connected to the Zynthian. Zynseq listens for triggers on a the Master MIDI channel.
Each sequence may be triggered by a MIDI note. Select "Trigger note" from ZynPad's context menu to adjust the MIDI note that will trigger the highlighted pad. By default triggers are disabled. To disable a sequence from being triggered set its trigger value to None which is below C-1 or above G9, i.e. increase to maximum value. The trigger note is shown in brackets after the sequence name on the left of the Arranger, e.g. A1 (2, C4) indicates sequence 1 is triggered by note C4.
ZynSeq will send MIDI note on / off messages to represent the current play status of each sequence. This may be used by an external pad controller like Novation's Launchpad to indicate the status of a sequence. The note number sent is the same as the external trigger configured for a sequence. Tallies are sent on the Master MIDI channel.
18 Arranger
Each pad triggers a sequence which may contain one or more patterns. By default each sequence contains a single pattern but it is possible to create more complex arrangements by adding more patterns to the sequence. The Arranger is a view that allows the manipulation of sequences used by pads. The Arranger is accessed from the context menu.
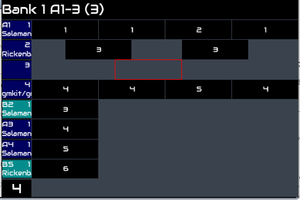
The view should change to show a different type of grid. Each horizontal row represents a sequence assigned to a pad. On the left the pad's name and some other info is shown on a coloured cell. To the right is where patterns are added and removed. This is called the Patterns Grid. Each sequence may have as many or few patterns as desired. It may be common to use just one pattern for each sequence but more complex combinations are possible.
When the Arranger is first opened the first pattern (or time slot) of the sequence for the previously highlighted pad will be highlighted.
Navigation around the patterns grid is performed by rotating the BACK encoder to move up and down (select different pads) and the SELECT encoder to move left and right (select time). The currently highlighted cell is shown by a coloured outline called the cursor.
Short press the SELECT encoder or short tap on touchscreen will add or remove a pattern at the position of the cursor. This may take a little practice to place it where you want but you can press, drag and release to position it more accurately.
The pattern to be added is indicated by a number in the bottom left of the screen. This can be adjusted with the LAYER encoder or by clicking on the number / selecting "Pattern" from the context menu to show the parameter editor.
Each pattern is represented as a black block with its pattern number in white text. Bold press SELECT or press and hold touchscreen to open the Pattern Editor for the selected pattern. BACK will return to the Arranger.
Note that triggering a pad in ZynPad starts a sequence which consists of patterns which in turn consists of the notes of your melody. This hierarchical relationship may be slightly more complex than a typical step sequencer offers many benefits. Just remember that a pad triggers a sequence. A sequence contains patterns. A pattern contains MIDI events, e.g. notes.
18.1 Complex Sequences
A sequence may have any quantity of patterns either sequentially or separated by time. Patterns may not overlap within a sequence, i.e. a pattern's start must be at or later than the preceeding pattern's end. To add patterns to a sequence, within Arranger:
- Select the required pattern
- Move the cursor to the sequence and time at which to add the pattern
- Short press SELECT
The cursor will show the duration of the pattern to be added. The cursor moves to the next time division unless the pattern will not fit within the gap in which case the cursor will jump to the start of the next pattern (even if the new pattern is longer than the next highligted pattern, to allow removal of patterns).
Encoders have been assigned to optimise this workflow: Move cursor to sequence with BACK encoder Move cursor to time with SELECT encoder Add / remove patterns with short press SELECT Select pattern with LAYER encoder
19 Zooming
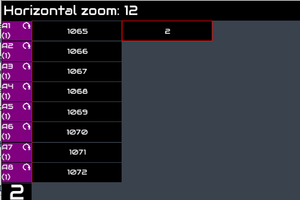
Within Arranger the quantity of visible sequences (rows) may be adjusted by selecting "Vertical zoom" from the context menu. The size of patterns may be adjusted by selecting "Horizontal zoom" from the context menu. This adjusts the quantity of timeslots shown so increasing horizontal zoom actauall zooms out.
Similarly, the quantity of keyboard notes in the Pattern Editor may be adjusted by selecting "Vertical zoom" from the context menu. There is no horizontal zoom for the Pattern Editor because it always shows all steps in a pattern.
20 Time Signature
TODO: Time signature is defined by song editor which is not yet enabled.
A pattern has three parameters that affect playback speed: Beats in pattern, Steps per beat & Beat type. These can each be changed from the Pattern Editor context menu.
Beat type defines the duration of each beat and corresponds to the denominator of a time signature. A value of 1 means the beat is a semibreve / whole note. 2 means minim / half note. 4 is a crotchet / quarter note, etc. This is not graphically obvious in the Pattern Editor because it does not change the steps in the pattern and all steps are shown. Beat type changes the duration and hence larger values result in smaller steps and faster playback of the pattern. This is obvious in the Arranger where the size of the pattern will change, growing for lower values of beat type.
Beats in pattern defines the quantity of beats the pattern spans. Each beat is represented by a vertical white line on the note grid. As the beats in pattern change these lines move accordingly. The higher the value of beats in pattern, the longer the pattern.
Steps per beat defines the quantisation level of the pattern. The higher the value the more steps in each beat and hence in the whole pattern. This parameter does not affect duration of pattern but existing patterns will expand or shrink which will affect its playback speed. The values are restricted to 1, 2, 3, 4, 6, 8, 12, 24. This allows for a variety of common subdivision of note lengths, e.g. quavers / sixteenth notes, triplets, double speed triplets, etc. (This constraint is technical but also aligns with common musical requirements.)
It may take some practice to master these parameters. Remember that steps per beat adjusts the quantisation level whilst beat type and beats in pattern adjusts pattern length.
21 Metronome
TODO
22 Drum Maps and Scales
By default the Pattern Editor shows a piano keyboard on the left side to represent the chromatic scale of notes for each row of the note grid. The scale may be changed by selecting "Scale" from the Pattern Editor's context menu. Scales include; Chromatic, Major, Minor, Blues & Blues pentonic. (Other scales may be added.) Changing the scale from Chromatic will hide notes in the note grid and all keys on the keyboard change to white, i.e. no blank keys are shown. Notes are hidden but not removed from the pattern which may result in notes not being visible. If a percussion preset or engine is selected for the current MIDI channel then an appropriate drum map is available in the list of scales.
Select "Tonic" from the Pattern Editor context menu to change the base note of the scale, e.g. A, A#, B, C, etc.
23 Pattern Management
A pattern may be cleared, copied or transposed by selecting the corresponding entry it the pattern manager context menu.
Clearing a pattern will remove all notes in the pattern after requesting confirmation.
Copying a pattern will copy all the notes and parameters of a pattern, overwritting the destination pattern after requesting confirmation.
Transposing a pattern moves all notes up or down a semitone at a time. Transpose is constrained to the MIDI range C-1 to G9. If any note in the pattern would be beyond this range then further transposing is prohibited. Transposing is only available when chromatic scale is used, i.e. drum maps cannot be transposed. An attept to transpose when a non-chromatic scale is being used will change the view to chromatic scale.
24 Import MIDI Files
There are some excellent percussion patterns available in MIDI File Format. Zynthian offers the ability to import such files into ZynSeq patterns. A MIDI file may be imported to one or more patterns. Some automation is involved in resolving pattern parameters, e.g. if the MIDI file contains events that would span more than one pattern, consecutive patterns are overwritten with the imported events. Only events from a single MIDI channel are imported.
- Use webconf to upload a MIDI File Format file to the Captures area
- Select a pattern to import into
- Use Pattern Editor's context menu to set the beats in pattern, steps per beat, beat type and Input channel (the MIDI channel to extract)
- Select "Import" from the Pattern Editor context menu
- A list of MIDI files is shown
- Use SELECT encoder to highlight the desired file then short press SELECT to import or use touchscreen to select the desired file
- MIDI note events are imported into the current and subsequent patterns, overwritting any existing patterns
- Events will be quantised to match the pattern configuration
To reconstruct the performance, add each pattern to a sequence.
25 Timebase
ZynSeq uses JACK timebase for its timing. Transport control and adjustment of tempo may be made by external JACK clients. Those clients may also use the same timebase. This means that ZynSeq can synchronise with other modules within Zynthian, e.g. synth engine LFO, arpegiators, etc. It also means that other modules may control ZynSeq playback to some degree. ZynSeq acts as the timebase master, i.e. the concept of bars, beats and ticks (fractions of beats) and consequently tempo (BPM) is provided by ZynSeq. There is currently no mechanism to lock to external MIDI clock but a Zynthian MIDI effects layer may be used to create MIDI clock output. There is a plan to improve this support in a future update.
Note that if a module alters the transport, e.g. stops it then ZynSeq may have unexpected behaviour. Check what engines are doing if you experience timing or playback issues.
