Zynthian UI User Guide (oldstable-2109)
1 The Zynthian's Hardware User Interface
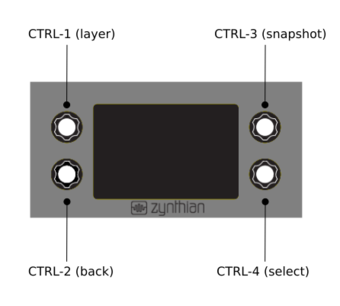
The Zynthian's Hardware UI is displayed on a touch display and controlled by 4 rotary-encoders with switches (push). The encoders/switch knobs are used to navigate between the different screens/menus, select options and change the instrument parameters, acting as MIDI/OSC controllers.
Currently there are two screen types (layouts):
- Selector Screen: a list of items that you can scroll and select with the SELECT (4) knob
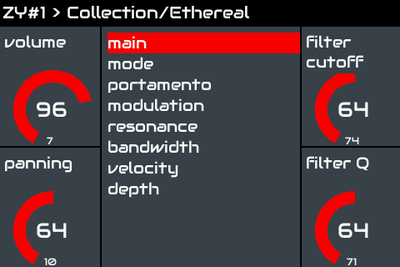
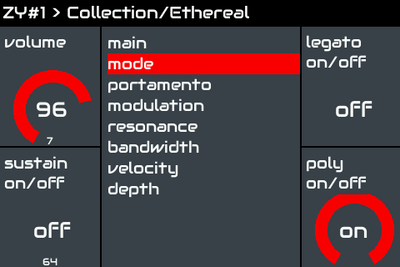
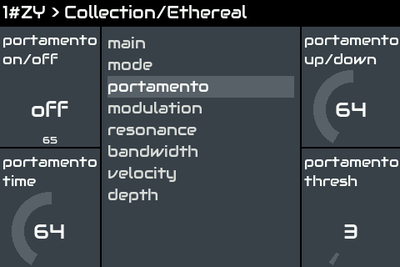
- Controller Screen: In the corners, 4 control widgets (one for each knob), with label and value indicator (graphic and numeric). In the middle, a list of controller maps which you can use to change or rotate using the SELECT (4) knob.
And there are 3 types of clicks (push) that can be performed, depending on how long you hold down the knob:
- short: less than 0.3 seconds
- bold: between 0.3 and 2 seconds
- long: more than 2 seconds
Actions for each knob and click type are context dependent. Generally, the SELECT knob and a short click is used to navigate and select items on a "Selector Screen". Inside a "Controller Screen", short clicks can be used to rotate between layers (LAYER) or between controller pages (SELECT). "Bold" clicks are intended as shortcuts for jumping to some specific screens. Clicking the BACK knob generally jumps to the previous screen in the sequence.
Loading and Saving snapshots: If you click SNAPSHOT (3) once, you get the Load Snapshot menu, another click and you will be in the Save Snapshot menu. If you bold-click SNAPSHOT then you will go directly to the Save Snapshot menu. The Snapshot menu have 2 levels: bank selection (directory) and snapshot (file).
2 The Zynthian UI Workflow
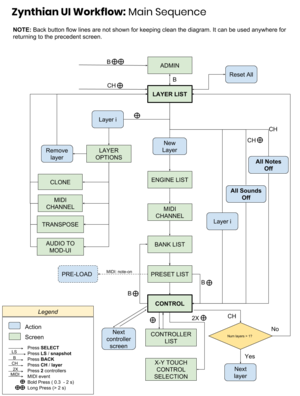
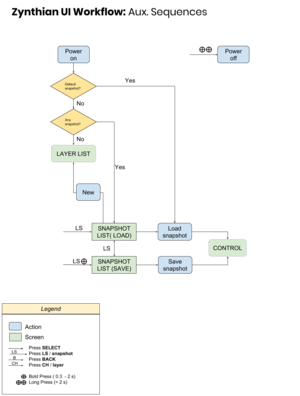
The next flowcharts show the different "screens" or "functions" and the way to reach each one using the 4 switches:
If you want to contribute improving these flowcharts, you can edit it using the Google Documents Tools:
- Main sequence: zynthian_ui_workflow_1
- Aux. Sequences: zynthian_ui_workflow_2
3 The UI Menus
3.1 Layer List
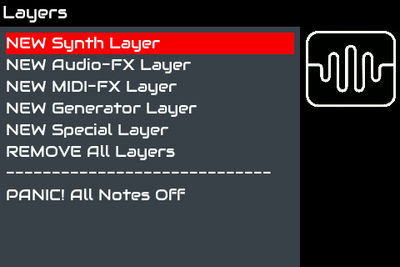
This is the first screen you see when you power on and no screenshots are stored yet.
Choose New Layer to get started. A layer is a synth engine preset assigned to one or several MIDI channels. You can adjust the preset parameters from the instrument control screen.
3.2 Engine Selection
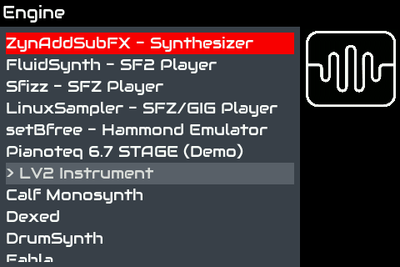
When you create a new layer, you are asked about the engine synth you want to use for the new layer. You will see the list of synth engines to choose from. The zynthian logo on the right is animated while engine is being loaded.
3.3 MIDI Channel selection
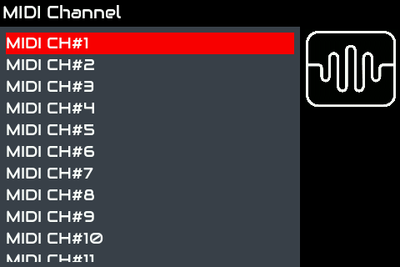
This screen is shown after you have chosen a synth engine for a new layer. Also when, from the Layer Options screen, you want to assign the layer to a different MIDI Channel. Choose the MIDI channel you want to assign to the layer. You can assign several layers to the same MIDI Channel. In such a case, all the assigned layers will react to MIDI messages coming from the assigned MIDI Channel.
3.4 Bank selection
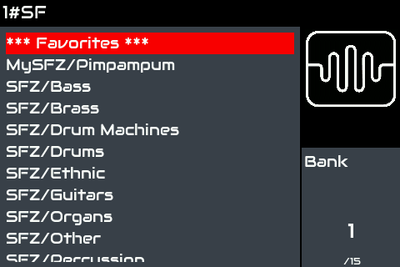
Presets (instruments, sound designs or patches) for a synth engine are organized into banks. Choose a bank to see the list of presets you can pick from in that bank.
3.5 Preset selection
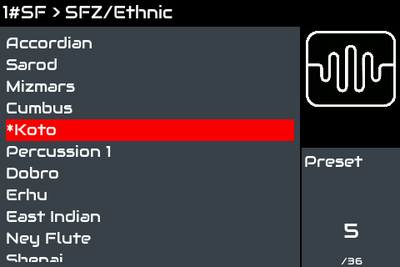
Once you have chosen a bank, Preset Screen will be shown. Choose a preset to load the instrument/sound/patch you want and the Control Instrument screen will be shown.
If the "pre-load on note-on" feature is enabled, you can pre-load the presets by playing notes. The highlighted preset will be pre-loaded before select.
3.6 Instrument Control screen
This screen is shown after you have chosen a preset. Your instrument is now playable and you can modify the parameters.
Turning each of the 4 knobs change the values of the synth parameters displayed in the squares at the sides of the screen. The list in the center of the screen allows you to choose the page of parameters. You can step one page by clicking select. If the list is long, you can "bold click" the select switch for navigating the list.
If you click 2 switches at once, then you will select these 2 parameters for XY-controlling using the touchscreen (ala kaospad).
Press the back switch to return to previous screen. If you press bold-back, then you will go 2 screens backwards.
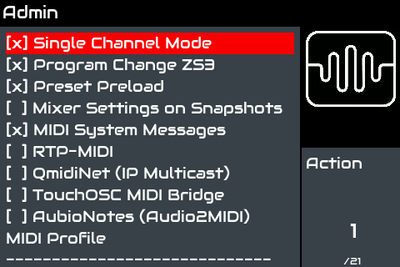
3.7 Admin Menu
Pressing the Back knob, when you are in the Layer List screen, brings you to the Admin menu. The last item is how you safely power off the Zynthian without corrupting data files.
4 Touch Screen UI
You can navigate and control the Zynthian UI without knobs/encoders/switches at all, using only the touchscreen.
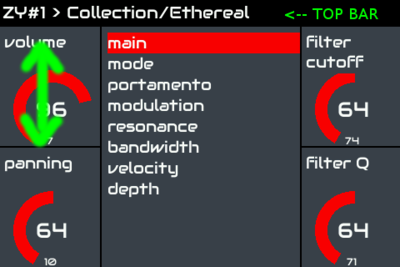
You can "emulate" the switches by tapping the controller widgets (squares in the 4 corners of a Controller screen). There are short, bold and long actions. Exactly the same workflow as with hardware knobs. When the "back" widget is not available, you can go back by tapping the top bar.
You can change the values of the controllers by "sliding" over the widgets. This is the same as turning the knob.
When clicking (tapping/touching) the topbar, a "back" event is triggered. It's a quick & dirty fix and probably it will change in the future, but meanwhile it will enable you to fully control Zynthian using the touchscreen if you don't have knob hardware.
5 Global MIDI-learning
It allows to easily bind any parameter from the Zynthian UI to any CC knob/slider from an external MIDI controller. I intend to extend the feature to other MIDI messages, but currently only CC messages are supported. Anyway, MIDI filter rules can handle these special cases, so it’s not an urgent task.
It works with ALL the engines, using the engine’s native MIDI-learning when available (and convenient) or the Zynthian’s MIDI-learning mechanism, based in the MIDI filter. To be more explicit, native MIDI-learning is used for MOD-UI and for ZynAddSubFX OSC parameters. All the MIDI-mapped parameters are managed by the Zynthian’s MIDI-learning mechanism.
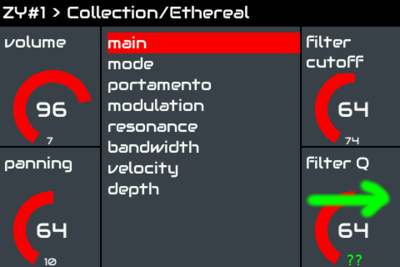
You get on-screen feedback during the learning process. When you enable the MIDI-learning for a parameter, a small green text with the string "??" appears on the botton side of the controller/parameter area in the Zynthian UI. When the parameter is bond, the number of the linked CC is shown in the same place.
The MIDI-learning configuration is stored in the snapshot.
5.1 How it works?
First, you need a working touch interface in your display. If not, you could use a mouse ...
Learning:
1. In the "Instrument Control" screen, navigate the parameter screen list until having the parameter you want to learn.
2. On the parameter/controller area, slide with your nail from left to right. A green "??" should appear in the bottom side.
3. In your MIDI controller, move the desired knob/slider (or a CC-assigned pad).  The green "??" should be replaced by a tiny number, and the parameter should change when you move the knob/slider or push the pad. CC-assigned pads can be very useful for "boolean" parameters (i.e. on/off).
Unlearning:
1. In the "Instrument Control" screen, navigate the parameter screen list until having the parameter you want to unlearn.
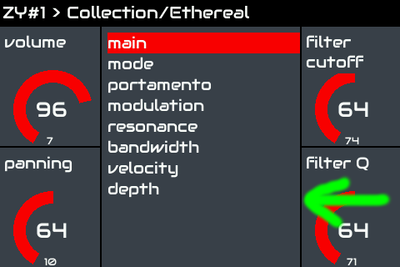
2. On the parameter/controller area, slide with your nail from right to left. The tiny number, indicating the current CC bond, should disappear or change. If the parameter is an engine-specific controlled engine, the number will disappear. If the parameter is hardcoded MIDI-mapped parameter, then the number will change.
